システム奮闘記:その95
phpmotion導入の話
(2012年1月4日に掲載)
はじめに


 動画配信といえば、大手のyoutubeを連想させる。
 色々な動画が無料で見れるだけに、ありがたいのだ。

 ところで、自宅や社内だけでyoutubeみたいな動画配信システムを
導入したい場合もある。

 そんな時に、オープンソース版の動画配信システムの
PHPmotionを使えば、無料で動画配信システムができるのだ。

 今回、勤務先に導入した動画配信システムの話をしたいと思います。


phpmotion導入までの経緯


 うちの会社の商品の扱い方やデモ動画がある。
 営業所に配るのだが、隣の部署の部長から

 CDに焼いて配ってね!

 と言われる。

 動画といっても、色々な形式がある。

 mpeg、avi、WMV、VOBなどなど

 そして拡張子が「mpg」で、mpeg形式の動画データでも

 mpeg1、mpeg2、mpeg4があるのだ!

 動画データの拡張子は同じなので、見た目では判断できないのだ。
 メチャクチャ厄介なのだ。


 そして営業所のパソコンを購入した時期はバラバラなため
どのパソコンが、どの動画が見れるのか

 全く把握できへん!!!

 という状態になっていた。

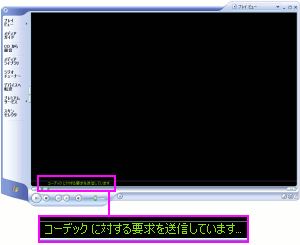
 同じWindowsXPのパソコンでも、WindowsMediaPlayerの
バージョンによって、動画の閲覧できたり、できなかったりする。
| WindowsMediaPlayerでのエラー |
|---|
 |
| そしてエラーが出る |
|---|
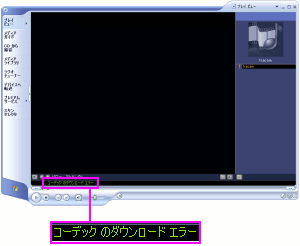 |
開けない動画がある場合、コーデックを探すみたいだが
見つからないようなのでエラー表示が出る。
|
 こんな感じで閲覧できない動画があったりする。
 ところで・・・

 コーデックって何やねん?

 だった。


 そこでコーデックを調べてみた。
| コーデックとは何か? |
|---|
アナログのデータをデジタル化するためのソフトや装置の事なのだ。
今はソフトが主流な上、データの圧縮なども兼ねている。
詳しい事は「システム奮闘記:その96」(動画コーデック)を
ご覧ください。
|
 それにしても動画の場合

 業界統一規格があらへん!

 そのため多種多様な形式の動画が世に出まくる。
 困るのは動画の閲覧者だ。何がどうなっているのか把握するのが困難なのだ。


 そこで、どの営業所でも色々が動画が見れるようにするため
動画閲覧ソフトの配布を行なう事にした。

 無償のソフトを探すと、GOM Playerがあった!!

 GOM PLAYER(ゴムプレイヤー)

 それでも・・・

 閲覧できへん動画がある・・・ (--;;

 どんな動画でも閲覧できる万能なソフトがない物だろうか。
 そこで無償の動画変換ソフトを探す事になった。
| 万能な無料動画再生ソフトがない理由 |
|---|
この原稿を書いている時に知ったのだが、コーデックの特許の問題があるのだ。
コーデックを利用するのに特許料を払う必要があるからだ。
コーデックの種類と特許と覇権争い(WebM VS H264)の話もあるのだが
ここでは割愛します。
|
 色々試したら、良い物が見つかった。

 Any Video Converterのフリー版だ!

 Any Vide Converterのサイト

 これでWMV形式に変換したら、Windowsのパソコン上なら動画が見れる。
| WMVのバージョンについて |
|---|
WMVにも色々なバージョンがある。
あまり高いバージョンだとWindowsXPパソコンの
WindowsMediaPlayerに対応していないため
閲覧できない物もあるので、WMV9にしておくのが無難なのだ。
|
PHPmotion導入の動機


 2011年、ある日の事、動画を営業所に配布する指示がきた。
 mpeg形式の動画だった。ところが・・・

 WMV形式に変換できへん (--;;

 だった。


 困った。動画変換できなければ、どうしようもない。
 どうやって営業所でも動画閲覧が可能になるのか。そこで思いついた。

 オープンソースの動画配信システム!

 なのだ。
 以前、オープンソースカンファレンスで聞いたのを思い出した。

 kaltureがあるやん!

 そこで、kaltuerのホームページを見てみる事にした。
 だが・・・

 説明がわからへん・・・ (--;;

 だった。

 そこで別のオープンソース動画配信の方法を探す事にした。
 すると・・・

 PHPmotionを発見!!

 だった。
 まさに渡りに船という感じだ。


 それにCDに焼くのは手間な上、社内向けのホームページから
ダウンロードしてもらうにも、100M以上あると
営業所がダウンロードするのに1時間以上かかったりする。


 phpmotionをインストールしようと思ったら

 ffmpegで動画変換できる!

 がわかった。
 そこで、まずはffmpegのインストールを行なう事にした。


ffmpegのインストール

 ffmepgを使えば、オープンソースで動画変換できる。
 そこで以下のサイトを参考にしてffmpegのインストールを行なった。

 FFmpeg を CentOS で使う


 ffmpegのインストールを行なうために、yasmや各種コーデックの
インストールの作業を行なう必要があるという。
 そこで一連の流れを書き出してみた。
ffmpegのインストールを行なうまでの
各種コーデックなどのインストール作業一覧 |
|---|
| (1) |
yasmのインストール
これだけコーデックではないが、コーデックのコンパイルに
必要なソフトなのだ。後述しています。 |
| (2) |
FAAD2のインストール
|
| (3) |
FAACのインストール
|
| (4) |
opencore-amrのインストール |
| (5) |
vo-amrwbencのインストール |
| (6) |
GMSのインストール |
| (7) |
LAMEのインストール |
| (8) |
OpenJPEGのインストール |
| (9) |
Theoraのインストール |
| (10) |
x264のインストール |
| (11) |
Xvidのインストール |
| (12) |
WebMのインストール |
12段階の作業を行なった後、ffmpegのインストールになるのだ。
| 注意 |
|---|
この後紹介するコーデックのインストール方法ですが
初めの第一歩の内容を忠実に再現するために
敢えて、その時行なった本の丸写しとエラーが出れば
対処療法の内容になっています。

もちろん、エラーが出ないようなインストール方法も
「再度、PHPmotionのインストール」で触れています。
|
yasmのインストール

 yasmはコーデックではないのだが、x264のコンパイルに
yasmが必要だという。
 ところで・・・

 yasmって何やねん?

 そこで調べてみると、MASMを書き換えた物でアセンブラで
新BSDライセンスのソフトなのだ。
 アセンブラの命令(ニーモニック)がMASMと同じアセンブラなのだ。
 と書いても、アセンブラを読み書きする事のない私なのだが (^^;;

 そこで以下のサイトからダウンロードする。
 The Yasm Modular Assembler Project

 そしてインストールを行なう。
| yasmを展開 |
|---|
[root@linux]# tar xvfz yasm-1.1.0.tar.gz
yasm-1.1.0/
yasm-1.1.0/config.h.in

(途中、省略)

yasm-1.1.0/ABOUT-NLS
yasm-1.1.0/libyasm.h
[root@linux]# cd yasm-1.1.0
[root@linux]#
|
そしてconfigureを行なう。
| configureを行なう。 |
|---|
[root@linux]# ./configure --prefix=/usr
checking for a BSD-compatible install... /usr/bin/install -c
checking whether build environment is sane... yes

(途中、省略)

config.status: creating po/POTFILES
config.status: creating po/Makefile
[root@linux]#
|
オプションは「--prefix=/usr」なのだ。

使っているのがCentOS5.6なので、環境設定しなくても
コマンドが認識できるよう、実行ファイル、ライブラリを
CentOS5.6の形式のディレクトリに入れるためなのだ。

(注意)
後述していますが、ちょっとした設定を加えるだけで
実は、このオプションを使わなくても良いのだ。
|
そしてコンパイルなのだ。
| コンパイルを行なう |
|---|
[root@linux]# make
gcc -std=gnu99  -I.  \
          -c -o genperf.o `test -f tools/genperf/genperf.c || echo './'`tools/genperf/genperf.c
gcc -std=gnu99  -I.  \

(途中、省略)

gcc -std=gnu99  -g -O2   -o vsyasm vsyasm.o yasm-options.o libyasm.a
make[2]: ディレクトリ `/usr/local/src/yasm-1.1.0' から出ます
make[1]: ディレクトリ `/usr/local/src/yasm-1.1.0' から出ます
[root@linux]#
|
そしてインストールを行なう。
| yasmのインストール |
|---|
[root@linux]# make install
make  install-recursive
make[1]: ディレクトリ `/usr/local/src/yasm-1.1.0' に入ります

(途中、省略)

make[2]: ディレクトリ `/usr/local/src/yasm-1.1.0' から出ます
make[1]: ディレクトリ `/usr/local/src/yasm-1.1.0' から出ます
[root@linux]#
|
 次に各種コーデックのインストールを行なう。

faad2とfaacのインストール

 faad2とfaacは以下のサイトからダウンロードした。
 AudioCoding.com FAAD2/FAAC

 さて、普段なら・・・

 faad2とfaacって何やねん?

 と疑問に思う所なのだが、そんな疑問が湧かずに
必要なコーデックの一種だと思って何かを確かめずに前に進む事にした。

 2つともダウンロードしたら、まずはfaad2のインストールから行なうので
faad2の展開を始める。
| faad2の展開 |
|---|
[root@linux]# tar xvfz faad2-2.7.tar.gz
faad2-2.7/
faad2-2.7/ChangeLog
faad2-2.7/AUTHORS
faad2-2.7/COPYING
faad2-2.7/aacDECdrop/

(途中、省略)

faad2-2.7/INSTALL
faad2-2.7/Makefile.in
[root@linux]#
[root@linux]# cd faad2-2.7
|
 このままconfigureといきたい所だが、ふと気づいた。
 README.linuxファイルの中身を見てみる。
| README.linuxファイルの中身 |
|---|
To compile under Linux.
----------------------
just run :

./configure --with-mp4v2
make
sudo make install


about the xmms plugin.
---------------------
 The xmms plugin need to be build after the install of the faad project.
so after you have installed correctly faad (--with-xmms options) you need
to configure and build the xmms plugin part in the plugins/xmms directory.
Read the README and INSTALL files into the xmms directory.
|
configureを行なう時に「--with-mp4v2」オプションが必要なようだ。
mp4に関する物だが、調べてみても、わからなかった。
|
そしてconfigureを行なう。
| configureを行なう |
|---|
[root@linux]# ./configure --with-mp4v2
checking for a BSD-compatible install... /usr/bin/install -c
checking whether build environment is sane... yes

(途中、省略)

config.status: creating config.h
config.status: executing depfiles commands
[root@linux]#
|
そしてコンパイルを行なう。
| コンパイル |
|---|
[root@linux]# make
make  all-recursive
make[1]: ディレクトリ `/usr/local/src/codec/faad2-2.7' に入ります
Making all in libfaad
make[2]: ディレクトリ `/usr/local/src/codec/faad2-2.7/libfaad' に入ります

(途中、省略)

make[2]: ディレクトリ `/usr/local/src/codec/faad2-2.7' から出ます
make[1]: ディレクトリ `/usr/local/src/codec/faad2-2.7' から出ます
[root@linux]#
|
 そしてmake installでインストールすれば完成。


 次にfaacのコンパイルを行なうため、faacの展開を行なう。
| faacの展開 |
|---|
[root@linux]# tar xvfz faac-1.28.tar.gz
faac-1.28/
faac-1.28/common/
faac-1.28/common/Cfaac/

(途中、省略)

faac-1.28/depcomp
faac-1.28/Makefile.in
[root@linux]# cd faac-1.28
[root@linux]#
|
そしてconfigureを行なう。
| configureを行なう |
|---|
[root@linux]# ./configure
checking for a BSD-compatible install... /usr/bin/install -c
checking whether build environment is sane... yes

(途中、省略)

config.status: linking ./config.h to common/mp4v2/mpeg4ip_config.h
config.status: executing depfiles commands
[root@linux]#
|
そしてコンパイルを行なう。
| コンパイルを行なう |
|---|
[root@linux]# make
make  all-recursive
make[1]: ディレクトリ `/usr/local/src/codec/faac-1.28' に入ります
Making all in include
make[2]: ディレクトリ `/usr/local/src/codec/faac-1.28/include' に入ります

(途中、省略)

make[2]: ディレクトリ `/usr/local/src/codec/faac-1.28' から出ます
make[1]: ディレクトリ `/usr/local/src/codec/faac-1.28' から出ます
[root@linux]#
|
そしてインストールを行なう。
| インストールを行なう |
|---|
[root@linux]# make install
Making install in include
make[1]: ディレクトリ `/usr/local/src/codec/faac-1.28/include' に入ります
make[2]: ディレクトリ `/usr/local/src/codec/faac-1.28/include' に入ります

(途中、省略)

make[2]: ディレクトリ `/usr/local/src/codec/faac-1.28' から出ます
make[1]: ディレクトリ `/usr/local/src/codec/faac-1.28' から出ます
[root@linux]#
|
opencore-amrのインストール

 次にopencore-amrのインストールを行なう。
 この時も、opencore-amrが何なのかを調べずに
Webサイトに書いている事を丸写しでインストールを行なう事にした。

 まずは展開から行なう。
| 展開作業 |
|---|
root@linux]# tar xvfz opencore-amr-0.1.2.tar.gz
opencore-amr-0.1.2/
opencore-amr-0.1.2/aclocal.m4
opencore-amr-0.1.2/amrnb/

(途中、省略)

opencore-amr-0.1.2/oscl/oscl_mem.h
opencore-amr-0.1.2/oscl/oscl_base.h
[root@linux]#
[root@linux]# cd opencore-amr-0.1.2
[root@linux]#
|
そしてconfigureを行なう。
| configureを行なう |
|---|
[root@linux]# ./configure
checking for a BSD-compatible install... /usr/bin/install -c
checking whether build environment is sane... yes

(途中、省略)

config.status: executing depfiles commands
config.status: executing libtool commands
[root@linux]#
|
コンパイルを行なう。
| コンパイルを行なう |
|---|
[root@linux]# make
make  all-recursive
make[1]: ディレクトリ `/usr/local/src/codec/opencore-amr-0.1.2' に入ります
Making all in amrnb

(途中、省略)

make[2]: ディレクトリ `/usr/local/src/codec/opencore-amr-0.1.2' から出ます
make[1]: ディレクトリ `/usr/local/src/codec/opencore-amr-0.1.2' から出ます
[root@linux]#
|
そしてインストールを行なうのだ。
| インストール作業 |
|---|
[root@linux]# make install
Making install in amrnb
make[1]: ディレクトリ `/usr/local/src/codec/opencore-amr-0.1.2/amrnb' に入ります

(途中、省略)

make[2]: ディレクトリ `/usr/local/src/codec/opencore-amr-0.1.2' から出ます
make[1]: ディレクトリ `/usr/local/src/codec/opencore-amr-0.1.2' から出ます
[root@linux]#
|
vo-amrwbencのインストール

 次に、音声コーデックのインストールを行なう。
 このコーデックは、参考にしたWebサイトには載っていなかったのだが
opencore-amrをダウンロードする際、このコーデックも拾ったので
そのままインストールする事にした。
| 展開作業 |
|---|
[root@linux]# tar xvfz vo-amrwbenc-0.1.1.tar.gz
vo-amrwbenc-0.1.1/
vo-amrwbenc-0.1.1/amrwbenc/

(途中、省略)

vo-amrwbenc-0.1.1/NOTICE
[root@linux]# cd vo-amrwbenc-0.1.1
[root@linux]#
|
そしてconfigureを行なう。
| configureを行なう |
|---|
[root@linux]# ./configure
checking for a BSD-compatible install... /usr/bin/install -c

(途中、省略)

config.status: executing libtool commands
[root@linus]#
|
そしてコンパイルを行なう。
| コンパイル |
|---|
[root@linux]# make
make  all-am
make[1]: ディレクトリ `/usr/local/src/codec/vo-amrwbenc-0.1.1' に入ります
  CC     wrapper.lo
  CC     cmnMemory.lo

(途中、省略)

  CCLD   libvo-amrwbenc.la
make[1]: ディレクトリ `/usr/local/src/codec/vo-amrwbenc-0.1.1' から出ます
[root@linux]#
|
そしてインストールだ。
| インストール |
|---|
[root@ffmpeg vo-amrwbenc-0.1.1]# make install
make[1]: ディレクトリ `/usr/local/src/codec/vo-amrwbenc-0.1.1' に入ります
test -z "/usr/local/lib" || /bin/mkdir -p "/usr/local/lib"

(途中、省略)

 /usr/bin/install -c -m 644 vo-amrwbenc.pc '/usr/local/lib/pkgconfig'
make[1]: ディレクトリ `/usr/local/src/codec/vo-amrwbenc-0.1.1' から出ます
[root@ffmpeg vo-amrwbenc-0.1.1]#
|
GSMのインストール

 次にGSMのインストールを行なう。
 もちろん、何のコーデックか調べずにインストールを行なった。

 まずは展開から。
| 展開 |
|---|
[root@linux]# tar xvfz gsm-1.0.13.tar.gz
gsm-1.0-pl13/
gsm-1.0-pl13/man/

(途中、省略)

gsm-1.0-pl13/Makefile
[root@linux]# cd gsm-1.0-pl13/
[root@linux]#
|
 このソフトの厄介なのは・・・

 自分でMakefikeを編集する必要があるのらー!

 といってもコンパイルのオプションなどを書くような
難しい話ではなく、単に実行ファイルやライブラリなどの
保管場所の指定の記述を行なうだけなのだ。

 Makefileの中身の書き換える所は4ヶ所だ。
| Makefileの書き換え(1) |
|---|
| 書き換え前 |
INSTALL_ROOT =
|
| 書き換え後 |
INSTALL_ROOT = /usr/local
|
2ヶ所目はここだ。
| Makefileの書き換え(2) |
|---|
| 書き換え前 |
GSM_INSTALL_INC = $(GSM_INSTALL_ROOT)/inc
|
| 書き換え後 |
GSM_INSTALL_INC = $(GSM_INSTALL_ROOT)/include/gsm
|
3ヶ所目はここだ。
| Makefileの書き換え(3) |
|---|
| 書き換え前 |
GSM_INSTALL_MAN = $(GSM_INSTALL_ROOT)/man/man3
|
| 書き換え後 |
GSM_INSTALL_MAN = /usr/share/man/man3
|
最後の4ヶ所目はここだ。
| Makefileの書き換え(4) |
|---|
| 書き換え前 |
TOAST_INSTALL_MAN = $(TOAST_INSTALL_ROOT)/man/man1
|
| 書き換え後 |
TOAST_INSTALL_MAN = /usr/share/man/man1
|
Makefileを書き変えたので、コンパイルを行なう。
| コンパイルを行なう |
|---|
[root@linux]# make
gcc -ansi -pedantic -c -O2 -DNeedFunctionPrototypes=1 -DSASR     -DWAV49  -I./inc src/add.c
gcc -ansi -pedantic -c -O2 -DNeedFunctionPrototypes=1 -DSASR     -DWAV49  -I./inc src/code.c
src/code.c: In function ‘Gsm_Coder’:

(途中、省略)

gcc -ansi -pedantic   -o ./bin/toast ./src/toast.o ./src/toast_lin.o ./src/toast_ulaw.o ./src/toast_alaw.o ./src/toast_audio.o ./lib/libgsm.a
rm  ./bin/tcat
rm: cannot remove `./bin/tcat': そのようなファイルやディレクトリはありません
make: [bin/tcat] エラー 1 (無視されました)
ln ./bin/toast ./bin/tcat
rm  ./bin/untoast
rm: cannot remove `./bin/untoast': そのようなファイルやディレクトリはありません
make: [bin/untoast] エラー 1 (無視されました)
ln ./bin/toast ./bin/untoast
.: Done.
[root@linux]#
|
コンパイルの最後でエラーが発生した。(赤い部分)
該当のファイルがないため、消去できないというのだ。
でも、無視して良いエラーなのだ (^^)
|
そしてインストールを行なう。
| インストール |
|---|
[root@linux]# make install
if [ x"/usr/local" != x ]; then \
                        make /usr/local/bin/toast /usr/local/bin/tcat /usr/local/bin/untoast /usr/share/man/man1/toast.1;       \
                fi
make[1]: ディレクトリ `/usr/local/src/codec/gsm-1.0-pl13' に入ります
rm /usr/local/bin/toast

(途中、省略)

make[1]: ディレクトリ `/usr/local/src/codec/gsm-1.0-pl13' から出ます
install: Done.
[root@linux]#
|
LAMEのインストール

 次にLAMEのインストールなのだ。
 もちろん、何のコーデックか調べずに行なった (^^)
| 展開の様子 |
|---|
[root@linux]# tar xvfz lame-3.98.4.tar.gz
lame-3.98.4/
lame-3.98.4/frontend/
lame-3.98.4/frontend/amiga_mpega.c

(途中、省略)

lame-3.98.4/include/lame.def
lame-3.98.4/HACKING
[root@linux]#
[root@linux]# cd lame-3.98.4
[root@linux]#
|
configureを行なう。
| configureを行なう |
|---|
[root@linux]# ./configure
checking build system type... i686-pc-linux-gnu
checking host system type... i686-pc-linux-gnu

(途中、省略)

config.status: creating config.h
config.status: executing depfiles commands
[root@linux]#
|
そしてコンパイルを行なう。
| コンパイルを行なう |
|---|
[root@linux]# make
make  all-recursive
make[1]: ディレクトリ `/usr/local/src/codec/lame-3.98.4' に入ります
Making all in mpglib
make[2]: ディレクトリ `/usr/local/src/codec/lame-3.98.4/mpglib' に入ります

(途中、省略)

make[2]: ディレクトリ `/usr/local/src/codec/lame-3.98.4' から出ます
make[1]: ディレクトリ `/usr/local/src/codec/lame-3.98.4' から出ます
[root@linux]#
|
そしてインストールを行なう。
| インストールを行なう |
|---|
[root@linux]# make install
Making install in mpglib
make[1]: ディレクトリ `/usr/local/src/codec/lame-3.98.4/mpglib' に入ります

(途中、省略)

make[1]: ディレクトリ `/usr/local/src/codec/lame-3.98.4' から出ます
[root@linux]#
|
openjpegのインストール

 openjpegが何かを調べずに、そのままインストール。
| 展開 |
|---|
[root@ffmpeg codec]# tar xvfz openjpeg_v1_4_sources_r697.tgz
openjpeg_v1_4_sources_r697/
openjpeg_v1_4_sources_r697/aclocal.m4

(途中、省略)

openjpeg_v1_4_sources_r697/CMake/CTestCustom.cmake.in
openjpeg_v1_4_sources_r697/CMake/OpenJPEGConfig.cmake.in
[root@linux]#
[root@linux]# cd openjpeg_v1_4_sources_r697
[root@linux]#
|
そしてconfigureを行なう。
| configureを行なう |
|---|
[root@linux]# ./configure
checking build system type... i686-pc-linux-gnu
checking host system type... i686-pc-linux-gnu

(途中、省略)

--enable-jp3d       : no
--enable-shared     : yes
----------------------------------------------
[root@linux]#
|
そしてコンパイルだ。
| コンパイル |
|---|
[root@linux]# make
make  all-recursive
make[1]: ディレクトリ `/usr/local/src/codec/openjpeg_v1_4_sources_r697' に入ります
Making all in libopenjpeg

(途中、省略)

make[2]: ディレクトリ `/usr/local/src/codec/openjpeg_v1_4_sources_r697' から出ます
make[1]: ディレクトリ `/usr/local/src/codec/openjpeg_v1_4_sources_r697' から出ます
[root@linux]#
|
最後にインストールだ。
| インストール |
|---|
[root@linux]# make install
Making install in libopenjpeg
make[1]: ディレクトリ `/usr/local/src/codec/openjpeg_v1_4_sources_r697/libopenjpeg' に入ります
make[2]: ディレクトリ `/usr/local/src/codec/openjpeg_v1_4_sources_r697/libopenjpeg' に入ります

(途中、省略)

make[2]: ディレクトリ `/usr/local/src/codec/openjpeg_v1_4_sources_r697' から出ます
make[1]: ディレクトリ `/usr/local/src/codec/openjpeg_v1_4_sources_r697' から出ます
[root@linux]#
|
Theoraのインストール

 Theoraが何かを調べずに、そのままインストール。
| 展開 |
|---|
[root@linux]# bzip2 -d libtheora-1.1.1.tar.bz2
[root@linux]# tar xvf libtheora-1.1.1.tar
libtheora-1.1.1/
libtheora-1.1.1/config.sub

(途中、省略)

libtheora-1.1.1/theoradec.pc.in
libtheora-1.1.1/theoradec-uninstalled.pc.in
[root@linux]#
[root@linux]# cd libtheora-1.1.1
[root@linux]#
|
configureを行なう。
| configureを行なう |
|---|
[root@linux]# ./configure
checking build system type... i686-pc-linux-gnu
checking host system type... i686-pc-linux-gnu
checking target system type... i686-pc-linux-gnu

(途中、省略)

    Type 'make' to compile libtheora.

    Type 'make install' to install libtheora.

    Type 'make check' to run test suite (Valgrind testing not enabled)

  Example programs will be built but not installed.
------------------------------------------------------------------------

[root@linux]#
|
コンパイルを行なう。
| コンパイル |
|---|
[root@linux]# make
make  all-recursive
make[1]: ディレクトリ `/usr/local/src/codec/libtheora-1.1.1' に入ります
Making all in lib
make[2]: ディレクトリ `/usr/local/src/codec/libtheora-1.1.1/lib' に入ります

(途中、省略)

make[2]: ディレクトリ `/usr/local/src/codec/libtheora-1.1.1' から出ます
make[1]: ディレクトリ `/usr/local/src/codec/libtheora-1.1.1' から出ます
[root@linux]#
|
そしてインストールを行なう。
| インストール |
|---|
[root@linux]# make install
Making install in lib
make[1]: ディレクトリ `/usr/local/src/codec/libtheora-1.1.1/lib' に入ります
make[2]: ディレクトリ `/usr/local/src/codec/libtheora-1.1.1/lib' に入ります

(途中、省略)

make[2]: ディレクトリ `/usr/local/src/codec/libtheora-1.1.1' から出ます
make[1]: ディレクトリ `/usr/local/src/codec/libtheora-1.1.1' から出ます
[root@linux]#
|
 だが、ここで終わらない。
 きちんと動作するかどうかの点検機能があるので点検を行なう。
| 動作点検 |
|---|
[root@linux]# make check
Making check in lib
make[1]: ディレクトリ `/usr/local/src/codec/libtheora-1.1.1/lib' に入ります
make[1]: `check' に対して行うべき事はありません.

(途中、省略)

make[1]: `check-am' に対して行うべき事はありません.
make[1]: ディレクトリ `/usr/local/src/codec/libtheora-1.1.1' から出ます
[root@linux]#
|
|
無事、点検が終わったのだ (^^)
|
x264のインストール

 これも何のコーデックか調べずにインストールを行なった。
| 展開 |
|---|
[root@linux]# bzip2 -d last_x264.tar.bz2
[root@linux]# tar xvf last_x264.tar
x264-snapshot-20110628-2245/
x264-snapshot-20110628-2245/x264dll.c

(途中、省略)

x264-snapshot-20110628-2245/AUTHORS
x264-snapshot-20110628-2245/.gitignore
[root@linux]#
[root@linux]# cd x264-snapshot-20110628-2245/
[root@linux]#
|
configureを行なう。
| configure |
|---|
[root@linuc]# ./configure --enable-static --enable-static --enable-shared
./version.sh: line 2: git: command not found
Platform:   X86
System:     LINUX
cli:        yes

(途中、省略)

You can run 'make' or 'make fprofiled' now.
[root@linux]#
|
そしてコンパイルだ。
| コンパイル |
|---|
[root@linux]# make
gcc -Wshadow -O3 -ffast-math  -Wall -I. -march=i686 -mfpmath=sse -msse -std=gnu99 -fomit-frame-pointer -fno-tree-vectorize   -c -o x264.o x264.c

(途中、省略)

gcc -o x264 x264.o input/input.o input/timecode.o input/raw.o input/y4m.o output/raw.o output/matroska.o output/matroska_ebml.o output/flv.o output/flv_bytestream.o filters/filters.o filters/video/video.o filters/video/source.o filters/video/internal.o filters/video/resize.o filters/video/cache.o filters/video/fix_vfr_pts.o filters/video/select_every.o filters/video/crop.o filters/video/depth.o input/thread.o libx264.a  -lm -lpthread
[root@linux]#
|
最後にインストールだ。
| インストール |
|---|
[root@linux]# make install
install -d /usr/local/bin
install x264 /usr/local/bin

(途中、省略)

install -m 644 libx264.a /usr/local/lib
ranlib /usr/local/lib/libx264.a
[root@linux]#
|
xvidのインストール

 これも何のコーデックか調べずにインストールを行なった。
| 展開 |
|---|
[root@linux]# tar xvfz xvidcore-1.3.2.tar.gz
xvidcore/
xvidcore/ChangeLog

(途中、省略)

xvidcore/vfw/vfw.dsp
xvidcore/AUTHORS
[root@linux]# cd xvidcore
[root@linux]#
|
 ここでconfigureといきたい所だが、configureファイルがない。
 そこでINSTALL方法が書いたファイルがないかと探してみると
「vidcore/doc/INSTALL」にあった。
| vidcore/doc/INSTALLを読む(一部抜粋) |
|---|
The next step allows you to configure the xvid sources.
  # cd ${xvidcore}/build/generic
  # ./configure
|
指定のディレクトリ(赤い部分)に移動した上で
configureを行なう必要があるという。
|
そして指定のディレクトリに移動する。
| 指定のディレクトリに移動 |
|---|
[root@ffmpeg generic]# pwd
/usr/local/src/codec/xvidcore/build/generic
[root@ffmpeg generic]# ls
Makefile      config.sub    install-sh       missing
bootstrap.sh  configure     libxvidcore.def  platform.inc.in
config.guess  configure.in  libxvidcore.ld   sources.inc
[root@ffmpeg generic]#
|
|
赤い部分がconfigureファイルだ。
|
configureを行なう。
| configureを行なう |
|---|
[root@ffmpeg generic]# ./configure
checking build system type... i686-pc-linux-gnu
checking host system type... i686-pc-linux-gnu

(途中、省略)

configure: creating ./config.status
config.status: creating platform.inc
[root@ffmpeg generic]#
|
そしてコンパイルだ。
| コンパイル |
|---|
[root@linux]# make

---------------------------------------------------------------
Object files used for this build
---------------------------------------------------------------

(途中、省略)

---------------------------------------------------------------
 Xvid has been successfully built.

 * Binaries are currently located in the '=build' directory
 * To install them on your system, you can run '# make install'
   as root.
---------------------------------------------------------------

[root@linux]#
|
最後にインストールだ。
| インストール |
|---|
[root@linux]# make install
  D: /usr/local/lib
  I: /usr/local/lib/libxvidcore.so.4.3
  I: /usr/local/lib/libxvidcore.a
  D: /usr/local/include
  I: /usr/local/include/xvid.h
[root@linux]#
|
WebMのインストール

 WebMについても何も調べずにインストールを行なった。
| 展開 |
|---|
[root@linux]# bzip2 -d libvpx-v0.9.6.tar.bz2
[root@linux]# tar xvf libvpx-v0.9.6.tar
libvpx-v0.9.6/
libvpx-v0.9.6/.gitattributes

(途中、省略)

libvpx-v0.9.6/y4minput.c
libvpx-v0.9.6/y4minput.h
[root@linux]#
[root@linux]# cd libvpx-v0.9.6
[root@linux]#
|
そしてconfigureだ。
| configure |
|---|
[root@ffmpeg libvpx-v0.9.6]# ./configure --enable-shared
Configuring selected codecs
  enabling vp8_encoder
  enabling vp8_decoder
Configuring for target 'x86-linux-gcc'
  enabling x86
  enabling pic
  enabling runtime_cpu_detect
  enabling mmx
  enabling sse
  enabling sse2
  enabling sse3
  enabling ssse3
  enabling sse4_1
  using yasm
  enabling postproc
Creating makefiles for x86-linux-gcc libs
Creating makefiles for x86-linux-gcc examples
Creating makefiles for x86-linux-gcc docs
[root@ffmpeg libvpx-v0.9.6]#
|
コンパイルを行なう。
| コンパイル |
|---|
[root@linux]# make
    [DEP] vpx_ports/x86_abi_support.asm.d
    [DEP] vpx_ports/emms.asm.d

(途中、省略)

    [CC] vp8cx_set_ref.c.o
    [LD] vp8cx_set_ref
make[1]: `all-docs' に対して行うべき事はありません.
[root@linux]#
|
そしてインストールだ。
| インストール |
|---|
[root@linux]# make install
    [INSTALL] /usr/local/include/vpx/vp8.h
    [INSTALL] /usr/local/include/vpx/vp8e.h

(途中、省略)

    [INSTALL] /usr/local/bin/vpxdec
    [INSTALL] /usr/local/bin/vpxenc
make[1]: `install' に対して行うべき事はありません.
[root@linux]#
|
 これでコーデックのインストールは終了した。
 それにしても長い作業だった。

ffmpegのインストール

 コーデックのインストールは終わった
 次にffmpegのインストールを行なう事にした。

 ここではffmpeg-0.7.1を使ったのだが
実際には、もっと新しいバージョンが出ていたのだが
この時は、これしかないと思って、インストールしたのだ。
| ffmpegの展開 |
|---|
[root@linux]# tar xvfz ffmpeg-0.7.1.tar.gz
ffmpeg-0.7.1/
ffmpeg-0.7.1/CREDITS
ffmpeg-0.7.1/libswscale/

(途中、省略)

ffmpeg-0.7.1/version.sh
ffmpeg-0.7.1/configure
[root@linux]# cd ffmpeg-0.7.1
[root@linux]#
|
そしてconfigureを行なう。
| configureを行なう |
|---|
[root@linux]# ./configure --enable-shared  --enable-nonfree
                          --enable-gpl  --enable-version3 --disable-ffplay
                          --disable-ffserver  --enable-libfreetype
                          --enable-libfaac  --enable-libgsm
                          --enable-libmp3lame  --enable-libopenjpeg
                          --enable-libopencore-amrwb
                          --enable-libopencore-amrnb --enable-libtheora
                          --enable-libvo-amrwbenc --enable-libx264
                          --enable-libxvid --enable-libvpx
|
configureのオプションは、各種コーデックを取り込むためだ。
これもWebサイトの丸写しなのだ (^^)
ちなみに、見やすくするため改行をいれていますが
実際にconfigureする時は改行しないでください。
|
そしてコンパイルを行なう。
| makeでコンパイル |
|---|
[root@linux]# make
CC      libavdevice/alldevices.o
In file included from libavdevice/avdevice.h:23,
                 from libavdevice/alldevices.c:22:

(途中、省略)

In file included from ffprobe.c:24:
libavformat/avformat.h:151: 警告: ‘AVMetadata’ is deprecated
LD      ffprobe_g
CP      ffprobe
STRIP   ffprobe
[root@linux]#
|
ffmpegのインストールを行なう。
| インストール |
|---|
[root@linux]# make install
INSTALL libavdevice/libavdevice.a
INSTALL libavdevice/libavdevice.so

(途中、省略)

INSTALL libavutil/avconfig.h
INSTALL libavutil/libavutil.pc
[root@linux]#
|
 これでインストールが完了した。

 やれやれと思って、ffmpegを動かすのだが・・・

 ffmpegがエラーを吐くやん (TT)

 だった。
| エラーを吐くffmpeg |
|---|
[root@linux]# ffmpeg
ffmpeg: error while loading shared libraries: libavdevice.so.52:
        cannot open shared object file: No such file or directory
[root@linux]#
|
共有ライブラリの「libavdevice.so.52:」が
読み込めないというエラーだ。
どうやら共有ライブラリを保管しているディレクトリーに
該当の共有ライブラリが存在しないようだ。
|
 さて、困った。
 確か、そのライブラリは・・・


 だが、そんな事は、夢にも思わない私だった。
 そこでライブラリが置いているサイトを探してみる事にした。
 すると、RPM形式で置いているサイトが見つかった。

 libavdevice52 Download - Linux Packages Search (RPM, DEB, XZ, TXZ, TGZ)

 ダウンロードした後、インストールする。
| ライブラリのインストール |
|---|
[root@linux]# rpm -ihv --nodeps libavdevice52-0.7-45_rc1.el5.i386.rpm
警告: libavdevice52-0.7-45_rc1.el5.i386.rpm: ヘッダ V4 DSA signature: NOKEY, key ID 66534c2b
準備中...                ########################################### [100%]
   1:libavdevice52          ########################################### [100%]
[root@linux]#
[root@linux]# rpm -ihv --nodeps libavcodec52-0.7-45_rc1.el5.i386.rpm
警告: libavcodec52-0.7-45_rc1.el5.i386.rpm: ヘッダ V4 DSA signature: NOKEY, key ID 66534c2b
準備中...                ########################################### [100%]
   1:libavcodec52           ########################################### [100%]
[root@linux]#
[root@linux]# rpm -ihv --nodeps libavformat52-0.7-45_rc1.el5.i386.rpm
警告: libavformat52-0.7-45_rc1.el5.i386.rpm: ヘッダ V4 DSA signature: NOKEY, key ID 66534c2b
準備中...                ########################################### [100%]
   1:libavformat52          ########################################### [100%]
[root@linux]#
[root@linux]# rpm -ihv --nodeps libavfilter1-0.7-45_rc1.el5.i386.rpm
警告: libavfilter1-0.7-45_rc1.el5.i386.rpm: ヘッダ V4 DSA signature: NOKEY, key ID 66534c2b
準備中...                ########################################### [100%]
   1:libavfilter1           ########################################### [100%]
[root@linux]#
|
おそらく音声関係のデバイス関連のライブラリだろうと
適当に思いながらインストールする事にした。
とりあえず先に動くようになるのを目標にした。

もし、これで動くようになったら、後から、このライブラリが何なのかを
調べたら良いのだ (^^)

(注意)
本当はインストールする必要はありません。
それについては後述しています。
|
 その結果・・・

 ffmpegが動くようになった!!

 これで、なんとかffmpegが動くようになった。

 意味もわからずWebサイトの丸写しでffmpegを動かしてみた。
 変換元のデータを、開けなかったmpegファイルにした。
| ffmpegを動かしてみる |
|---|
[suga@linux]# ffmpeg -i G1200.mpg  output.avi
ffmpeg version 0.7.1, Copyright (c) 2000-2011 the FFmpeg developers
  built on Jul  7 2011 11:02:02 with gcc 4.1.2 20080704 (Red Hat 4.1.2-50)
  configuration: --enable-shared --enable-nonfree --enable-gpl --enable-version3 --disable-ffplay --disable-ffserver --enable-libfreetype --enable-libfaac --enable-libgsm --enable-libmp3lame --enable-libopenjpeg --enable-libopencore-amrwb --enable-libopencore-amrnb --enable-libtheora --enable-libvo-amrwbenc --enable-libx264 --enable-libxvid --enable-libvpx
  libavutil    50. 43. 0 / 50. 43. 0
  libavcodec   52.122. 0 / 52.122. 0
  libavformat  52.110. 0 / 52.110. 0
  libavdevice  52.  5. 0 / 52.  5. 0
  libavfilter   1. 80. 0 /  1. 80. 0
  libswscale    0. 14. 1 /  0. 14. 1
  libpostproc  51.  2. 0 / 51.  2. 0
[mpeg @ 0x987ce00] max_analyze_duration 5000000 reached at 5000000
Input #0, mpeg, from 'G1200.mpg':
  Duration: 00:06:41.78, start: 0.220000, bitrate: 4455 kb/s
    Stream #0.0[0x1e0]: Video: mpeg2video (Main), yuv420p, 720x576 [PAR 16:15 DAR 4:3], 6000 kb/s, 25 fps, 25 tbr, 90k tbn, 50 tbc
    Stream #0.1[0x1c0]: Audio: mp2, 48000 Hz, stereo, s16, 224 kb/s
[buffer @ 0x987f760] w:720 h:576 pixfmt:yuv420p tb:1/1000000 sar:16/15 sws_param:
Output #0, avi, to 'output.avi':
  Metadata:
    ISFT            : Lavf52.110.0
    Stream #0.0: Video: mpeg4, yuv420p, 720x576 [PAR 16:15 DAR 4:3], q=2-31, 200 kb/s, 25 tbn, 25 tbc
    Stream #0.1: Audio: mp2, 48000 Hz, stereo, s16, 64 kb/s
Stream mapping:
  Stream #0.0 -> #0.0
  Stream #0.1 -> #0.1
Press [q] to stop, [?] for help
[mpeg2video @ 0x987f840] warning: first frame is no keyframe
    Last message repeated 1 times  19495kB time=00:06:38.20 bitrate= 401.1kbits/s
frame=10045 fps=130 q=31.0 Lsize=   20047kB time=00:06:41.80 bitrate= 408.7kbits/s
video:16266kB audio:3139kB global headers:0kB muxing overhead 3.310114%
[suga@linux]$
|
mpegファイルをAVI形式への変換を行なった。
動画の大きさなどの指定は、オプションを使うのだが
オプションが多い上、動画に関する知識がないため
全く使い方がわからないのだ (^^;;
|
 そして変換した動画を再生してみると・・・

 見事に閲覧できた (^^)V

 だった。
 もちろん、AVI形式だと見れないパソコンがあるので
万々歳ではなかったが、それでも変換できる事がわかったので
良かったのだ (^^)


phpmotionのインストール

 これでコーデックのインストールが終わった上
ffmpegのインストールもできた。

 次に動画配信のphpmotionのインストールを行なう。
 ここでも、もちろん・・・

 サイトの丸写しなのらー (^^)

 というわけで、無理に自主性を出してコケるよりも
自主性のなさを丸出しにして、前に進む事にした。


 PHPmotionのインストール作業を開始する事にした。
 でも、書籍はない。そこで検索サイトで調べる事にした。
 すると以下のサイトを発見した。

 PHPmotion | wiki

 このサイトを見ると以下の手順で各種ソフトの
インストールを行なうというのだ。
| PHPmotionの構築までの大まかな流れ |
|---|
| (1) |
Apache2のインストール。
Webサーバーには必須でおなじみのApacheなのだ。
|
| (2) |
MySQLのインストール
データベースはMySQLを使う
|
| (3) |
phpのインストール
PHP言語で稼働するので、これも必須。
|
| (4) |
各種コーデックのインストール
|
| (5) |
flvtool2のインストール
このソフトは何なのか? 後述しています。
|
| (6) |
ffmpegのインストール
動画変換ソフトの一種なのだ。
|
| (7) |
mplayerのインストール
何のソフトか後述しています。
|
| (8) |
ffmepg-phpのインストール
何のソフトなのか後述しています。
|
 以上の流れで各種ソフトのインストールを行なうのだ。
 と偉そうに書きつつ、Webサイトの受け売りを書くと
なんて楽なんだと思ったりする (^^)


 既に、各種コーデックとffmpegのインストールは完了しているので
その部分だけを省略して、PHPmotionのインストールを行なう事にした。

 まずはApache2のインストールを行なう。
| Aapche2の展開 |
|---|
[root@linux]# tar xvfz httpd-2.2.19.tar.gz
httpd-2.2.19/
httpd-2.2.19/emacs-style
httpd-2.2.19/httpd.dsp

(途中、省略)

httpd-2.2.19/README
httpd-2.2.19/LAYOUT
httpd-2.2.19/buildconf
httpd-2.2.19/.gdbinit
[root@linux]# cd httpd-2.2.19
[root@linux]#
|
そしてconfigureを行なう。
| configureを行なう |
|---|
[root@linux]# ./configure
checking for chosen layout... Apache
checking for working mkdir -p... yes
checking build system type... i686-pc-linux-gnu
checking host system type... i686-pc-linux-gnu

(途中、省略)

config.status: creating build/config_vars.sh
config.status: creating include/ap_config_auto.h
config.status: executing default commands
[root@linux]#
|
最初、何のオプションもつけずに行なった。
だが、実際には「--enable-rewrite」オプションが必要なのだが
その理由は後述しています。
|
そしてmakeを行なう。コンパイルなのだ。
| Apache2のmakeを行なう |
|---|
[root@linux]# make
Making all in srclib
make[1]: ディレクトリ `/usr/local/src/httpd-2.2.19/srclib' に入ります
Making all in apr
make[2]: ディレクトリ `/usr/local/src/httpd-2.2.19/srclib/apr' に入ります

(途中、省略)

make[1]: ディレクトリ `/usr/local/src/httpd-2.2.19' から出ます
[root@linux]#
|
そしてApache2のインストールなのだ。
| Aapche2のインストール |
|---|
[root@linux]# make install
Making install in srclib
make[1]: ディレクトリ `/usr/local/src/httpd-2.2.19/srclib' に入ります
Making install in apr

(途中、省略)

mkdir /usr/local/apache2/manual
make[1]: ディレクトリ `/usr/local/src/httpd-2.2.19' から出ます
[root@linux]#
|
 Apache2の設定は後で行なう。

MySQLのインストール

 データベースにはMySQLが使われるため、MySQLのインストールは
必要になる。

 実は、CentOS5.6のインストール時に、MySQL本体を
インストールするで選んだため、既にインストール済みです。

 しかし、MySQL関連のヘッダーやライブラリは
インストールされていないので、これらをインストールを行なう必要がある。

 PHPでMySQLを呼び出すために必要なのだ。
 (ライブラリの依存性のため)

 今回、CentOS5.6を使っているのでRPMを使って
MySQLのヘッダーやライブラリのインストールを行なう。
| MySQLのヘッダーやライブラリのインストール |
|---|
[root@linux]# rpm -ihv mysql-devel-5.0.77-4.el5_5.4.i386.rpm
警告: mysql-devel-5.0.77-4.el5_5.4.i386.rpm: ヘッダ V3 DSA signature: NOKEY, key ID e8562897
準備中...                ########################################### [100%]
   1:mysql-devel            ########################################### [100%]
[root@linux]#
|
 これでMySQLに接続するPHPの関数が使えるようになった。

 MySQLの設定について後述しています。

PHPのインストール

 次にPHPのインストールを行なう。
 PHPを展開する。
| PHPの展開 |
|---|
[root@linux]# tar xvfz php-5.3.6.tar.gz
php-5.3.6/
php-5.3.6/ext/
php-5.3.6/ext/gd/

(途中、省略)

php-5.3.6/README.UNIX-BUILD-SYSTEM
php-5.3.6/buildconf.bat
[root@linux]# cd php-5.3.6
[root@linux]#
|
そしてconfigureを行なう。
| configureを行なう |
|---|
configure --with-apxs2=/usr/local/apache2/bin/apxs --disable-ipv6
          --with-zlib --with-bz2 --with-gd --enable-mbstring
          --with-mysql --enable-bcmath
|
色々なライブラリを取り込むために多くのオプションをつける。
今回、IPv6を外しましたが、IPが枯渇してしまったため
将来は、IPv6を外さない方が賢明でしょう (^^)

(注意1)
見やすいように改行をいれていますが、実際は改行はしません。

(注意2)
実は、必要なオプションが1つ欠けています。
ここでは、失敗した結果を忠実に書くため
敢えて必要なオプションを書いていません。
必要なオプションについては後述しています。
|
configureが終わったら、次はコンパイルなのだ。
| コンパイルを行なう |
|---|
[root@linux]# make
/bin/sh /usr/local/src/php-5.3.6/libtool --silent --preserve-dup-deps

(途中、省略)

invertedregexiterator.inc
phar.inc

Build complete.
Don't forget to run 'make test'.

[root@linux]#
|
青い部分は「点検を忘れないで」の意味だ。
コンパイルしてできた物が正常に動くかどうかの点検なのだ。
|
そこで点検を行なう事にする。
| 正常に動くかどうかの点検 |
|---|
[root@linux]# make test

(途中、省略)

the test cases are doing. If you don't want to send it
immediately, you can choose "s" to save the report to
a file that you can send us later.
Do you want to send this report now? [Yns]: n
[root@linux]#
|
赤い部分で報告をしますかと問われますが
報告する必要もないと思ったので「いいえ」の「n」を選択した。
|
そしてインストールを行なう。
| インストール |
|---|
[root@linux]# make install

(途中、省略)

You may want to add: /usr/local/lib/php to your php.ini include_path
/usr/local/src/php-5.3.6/build/shtool install -c ext/phar/phar.phar /usr/local/bin
ln -s -f /usr/local/bin/phar.phar /usr/local/bin/phar
Installing PDO headers:          /usr/local/include/php/ext/pdo/
[root@linux]#
|
 これでPHPのインストールは完了だ。
 設定については後述しています。

各種コーデックのインストール

 本来なら、ここでインストールする必要があるのだが
ffmpegのインストールの際、既に必要と思われるコーデックは
インストール済なので、省略します。

ffmpegのインストール

 本来なら、ffpmegをインストールするのだが
既にインストールしてしまったので、省略する事にする。

flvtool2とmplayerのインストール

 ところで「flvtool2」と「mplayer」をインストールするのだが
このソフトが・・・

 別にインストールしなくても良さそう!

 と思ったので、ここではインストールしなかった。

ffmpeg-phpのインストール

 まずはソフトの展開から。
| ffmpeg-phpの展開 |
|---|
[root@linux]# bzip2 -d ffmpeg-php-0.6.0.tbz2
[root@linux]# tar xvf ffmpeg-php-0.6.0.tar
ffmpeg-php-0.6.0/
ffmpeg-php-0.6.0/tests/

(途中、省略)

ffmpeg-php-0.6.0/ffmpeg_tools.c
ffmpeg-php-0.6.0/ffmpeg_tools.h
[root@linux]#
[root@linux]# cd ffmpeg-php-0.6.0
[root@linux]#
|
そしてファイル一覧を眺めてみる。
| 展開後、ファイルの一覧を見る |
|---|
[root@linux]# ls
CREDITS       LICENSE       ffmpeg_errorhandler.c  ffmpeg_movie.h  gd_io.h
ChangeLog     TODO          ffmpeg_frame.c         ffmpeg_tools.c  php_ffmpeg.h
EXPERIMENTAL  config.m4     ffmpeg_frame.h         ffmpeg_tools.h  test_ffmpeg.php
INSTALL       ffmpeg-php.c  ffmpeg_movie.c         gd.h            tests
[root@linux]#
|
 configureファイルがあらへん!!

 どうやってmakefileを作成するのだろうか。
 でも、ここは慌てずインストール方法が書いているINSTALLファイルを見る。
| INSTALLの中身 (一部抜粋) |
|---|
BUILDING FFMPEG-PHP AS A SHARED EXTENSION
-----------------------------------------

1. Build php if not already built or installed by your distro (See the file INSTALL in your php source directory)

2. Unpack the archive

        tar -xjf ffmpeg-php.X.x.x.tbz2 -C /path/to/php_sources/ext/

3. cd into the ffmpeg extension directory

        cd /path/to/php_sources/ext/ffmpeg-php.X.X.X/

4. Run phpize (included with your php install) to build configuration files

        phpize

5. Configure and build

        ./configure && make

6. Install the shared extension

        make install (as root)
|
赤い部分にあるうに、まずはphpizeというプログラムを実行させる。
そして青い部分にあるように、configureとmakeを使う。
|
 なので、早速、phpizeを動かすのだが、見た事もないコマンドなので
実際に、そんなコマンドがあるのか確かめる事にした。
| 「man phpize」をやってみる |
|---|
phpize(1)                     Scripting Language                     phpize(1)

NAME
       phpize - prepare a PHP extension for compiling

SYNOPSIS
       phpize [options]

DESCRIPTION
       phpize is a shell script to prepare PHP extension for compiling.

OPTIONS
       --clean        Remove all created files
       --help         Prints usage information
       --version
       -v             Prints API version information

       SEE ALSO
              php(1)

VERSION INFORMATION
       This manpage describes php, version 5.3.6.
|
PHPに拡張モジュールの類をコンパイルする時の準備に使うようだ。
PHPをインストールしたら、実行ファイルとしてインストールされる物だ。
|
 PHPにこんなコマンドがあったとは知らへんかった!!

 少し賢くなった所で、実際に、phpizeを実行してみる。
| phpizeコマンドを使ってみる |
|---|
[root@linux]# phpize
Configuring for:
PHP Api Version:         20090626
Zend Module Api No:      20090626
Zend Extension Api No:   220090626
[root@linux]#
|
するとconfigureファイルが生成された。
| configureファイルが生成された |
|---|
[root@linux]# ls
CREDITS          acinclude.m4    config.sub             ffmpeg_movie.c  ltmain.sh
ChangeLog        aclocal.m4      configure              ffmpeg_movie.h  missing
EXPERIMENTAL     autom4te.cache  configure.in           ffmpeg_tools.c  mkinstalldirs
INSTALL          build           ffmpeg-php.c           ffmpeg_tools.h  php_ffmpeg.h
LICENSE          config.guess    ffmpeg_errorhandler.c  gd.h            run-tests.php
Makefile.global  config.h.in     ffmpeg_frame.c         gd_io.h         test_ffmpeg.php
TODO             config.m4       ffmpeg_frame.h         install-sh      tests
[root@linux]#
|
configureを実行する。
| configureを実行 |
|---|
[root@linux]# ./configure
checking for egrep... grep -E
checking for a sed that does not truncate output... /bin/sed


(途中、省略)


configure: creating ./config.status
config.status: creating config.h
[root@linux]#
|
ここでコンパイルを行なう。
| コンパイルを行なう |
|---|
[root@linux]# make
/bin/sh /usr/local/src/ffmpeg-php-0.6.0/libtool --mode=compile cc  -I. -I/usr/local/src/ffmpeg-php-0.6.0 -DPHP_ATOM_INC -I/usr/local/src/ffmpeg-php-0.6.0/include -I/usr/local/src/ffmpeg-php-0.6.0/main -I/usr/local/src/ffmpeg-php-0.6.0 -I/usr/local/include/php -I/usr/local/include/php/main -I/usr/local/include/php/TSRM -I/usr/local/include/php/Zend -I/usr/local/include/php/ext -I/usr/local/include/php/ext/date/lib -I/usr/local/include/libavcodec/ -I/usr/local/include/libavformat/ -I/usr/local/include/libavutil/ -I/usr/local/include/libswscale/ -I/usr/local/include/libavfilter/ -I/usr/local/include/libavdevice/  -DHAVE_CONFIG_H  -g -O2 -Wall -fno-strict-aliasing   -c /usr/local/src/ffmpeg-php-0.6.0/ffmpeg-php.c -o ffmpeg-php.lo

(途中、省略)

/usr/local/src/ffmpeg-php-0.6.0/ffmpeg_frame.c: In function ‘zim_ffmpeg_frame_ffmpeg_frame’:
/usr/local/src/ffmpeg-php-0.6.0/ffmpeg_frame.c:421: error: ‘PIX_FMT_RGBA32’ undeclared (first use in this function)
make: *** [ffmpeg_frame.lo] エラー 1
[root@linux]#
|
途中でコンパイルエラーが発生した。
赤い部分の「PIX_FMT_RGBA32」が鍵を握っているようだ。
|
 なんでエラーが出るねん (TT)

 そこでエラーの原因を調べてみる事にした。
 検索サイトで「PIM_FMT」などで調べると見つかった。

 ffmpeg-php - error: 'PIX_FMT_RGBA32' undeclared (first use in this function)

 RGBA32をRGB32に書き換える

 というのだ。

 そこでffmepg_frame.cのソースの421行を書き換える。
| ffmpeg_fram.c 421行の書き換え |
|---|
| 書き換え前 |
/* create a an av_frame and allocate space for it */
frame = avcodec_alloc_frame();
avpicture_alloc((AVPicture*)frame, PIX_FMT_RGBA32, width, height);
|
| 書き換え後 |
/* create a an av_frame and allocate space for it */
frame = avcodec_alloc_frame();
avpicture_alloc((AVPicture*)frame, PIX_FMT_RGB32, width, height);
|
気を取り直して再度コンパイルを行なう。
| 再度、コンパイルを行なう |
|---|
[root@linux]# make
/bin/sh /usr/local/src/ffmpeg-php-0.6.0/libtool --mode=compile cc  -I. -I/usr/local/src/ffmpeg-php-0.6.0 -DPHP_ATOM_INC -I/usr/local/src/ffmpeg-php-0.6.0/include -I/usr/local/src/ffmpeg-php-0.6.0/main -I/usr/local/src/ffmpeg-php-0.6.0 -I/usr/local/include/php -I/usr/local/include/php/main -I/usr/local/include/php/TSRM -I/usr/local/include/php/Zend -I/usr/local/include/php/ext -I/usr/local/include/php/ext/date/lib -I/usr/local/include/libavcodec/ -I/usr/local/include/libavformat/ -I/usr/local/include/libavutil/ -I/usr/local/include/libswscale/ -I/usr/local/include/libavfilter/ -I/usr/local/include/libavdevice/  -DHAVE_CONFIG_H  -g -O2 -Wall -fno-strict-aliasing   -c /usr/local/src/ffmpeg-php-0.6.0/ffmpeg-php.c -o ffmpeg-php.lo

(途中、省略)

Build complete.
Don't forget to run 'make test'.

[root@linux]#
|
無事、コンパイルが成功した。
でも、赤い部分にある通り「忘れずに検査」が必要だ。
|
そして問題なく動くかどうかの検査を行なう。
| 検査を行なう |
|---|
[root@linux]# make test

Build complete.
Don't forget to run 'make test'.

(途中、省略)

a file that you can send us later.
Do you want to send this report now? [Yns]: n
[root@linux]#
|
検査の結果、問題なしのようだ。
検査結果の報告の送信は任意なので、ここでは行なわなかった。
|
そしてインストールを行なう。
| ffmpeg-phpのインストール |
|---|
[root@linux]# make install
Installing shared extensions:     /usr/local/lib/php/extensions/no-debug-non-zts-20090626/
[root@linux]#
|
 これでffmpeg-phpのインストールは完了した。
 あとはPHPの設定ファイルで、モジュールを取り込むための
記述を行なえば良いのだ。

MySQLの設定

 ここでMySQLの設定を行なう。
 でも、MySQLは使ったことがないので、適当にWebに書いてある事を
真似するしかないのだ。
| 言い訳として |
|---|
私はPostgreSQLを使っていますが、決して反MySQLではありません。
単に、そこまで手が回らないだけです。覚えるのも大変だし
覚えたら、システム奮闘記に書かないといけないため
パーマンのコピーロボがない限り、とても無理です m(--)m
|
まずはMySQLの起動だ。
| MySQLの起動 |
|---|
[root@linux]# /etc/rc.d/init.d/mysqld start
MySQL を起動中:                                            [  OK  ]
[root@linux]#
|
 そしてMySQLの設定を行なう。
 まずはMySQLの管理者のパスワードの設定を行なう。
| MySQLの管理者のパスワード設定 |
|---|
[root@linux]# mysql -u root
Welcome to the MySQL monitor.  Commands end with ; or \g.
Your MySQL connection id is 4
Server version: 5.0.77 Source distribution

Type 'help;' or '\h' for help. Type '\c' to clear the buffer.

mysql> SET PASSWORD FOR 'root'@'localhost' = PASSWORD('mayumi');
Query OK, 0 rows affected (0.00 sec)

mysql> SET PASSWORD FOR 'root'@'127.0.0.1' = PASSWORD('mayumi');
Query OK, 0 rows affected (0.00 sec)

mysql>
|
赤い部分でわかるように、初期状態では管理者パスワードがないため
パスワードなしでMySQLの管理者になれる。

そこで青い部分の記述にあるように、管理者パスワードを設定する。
ピンクの部分だが、ローカル(自分自身)からの接続用のパスワードなのだ。
自分自身と他のマシンからの接続でパスワードを分ける事ができるのだ。
パスワードは、私の愛する小野真弓の「mayumi」なのだ (♥o♥)
|
そして管理者権限でデータベースの作成を行なう。
| 管理者権限でデータベースの作成 |
|---|
mysql> CREATE DATABASE moviedb CHARACTER SET UTF8 ;
Query OK, 1 row affected (0.02 sec)

mysql>
|
ここではデータベース名を「moviedb」にした。
文字コードはUTF-8にした。本の丸写しだけど (^^;;
|
 データベースの接続する場合だが、まさか管理者のrootで
接続するわけにはいかない。
 そこで、ユーザー名を作成する。ついでにパスワードの設定も行なう。
| MySQLのユーザー作成とパスワード設定 |
|---|
mysql> CREATE USER mayumi@localhost ;
Query OK, 0 rows affected (0.00 sec)

mysql>

mysql> SET PASSWORD FOR 'mayumi'@'localhost' = PASSWORD('lover');
Query OK, 0 rows affected (0.00 sec)

mysql>
|
ユーザー名を「mayumi」にして、パスワードを「lover」にした。
デモ実験なので、こんなパスワードでも良いのだが
実際に運用の場合は、あまりお薦めしません (^^)
|
実際、登録した「mayumi」でMySQLに接続してみる。
| 「mayumi」でMySQLに接続してみる |
|---|
[root@linux]# mysql -u mayumi -p
Enter password:
Welcome to the MySQL monitor.  Commands end with ; or \g.
Your MySQL connection id is 205
Server version: 5.0.77 Source distribution

Type 'help;' or '\h' for help. Type '\c' to clear the buffer.

mysql>
|
|
問題なく「mayumi」で接続する事ができた (^^)
|
 これでMySQLの設定は終了だ。

Apache2の設定

 PHPmotionを格納するディレクトリを
 /usr/local/apache2/phpmotionとするため、
Apache2の設定ファイル(httpd.conf)を以下のように変更する。

 まずはHTMLなどの文書関連のルートディレクトリの設定について
HTMLなどのファイルを置くための
ルートディレクトリの指定 (httpd.conf) |
|---|
#
# DocumentRoot: The directory out of which you will serve your
# documents. By default, all requests are taken from this directory, but
# symbolic links and aliases may be used to point to other locations.
#
DocumentRoot "/usr/local/apache2/phpmotion"
|
ルートディレクトリの指定だ。
この指定にこだわらなくても良いのだ。
|
 そしてPHPmotionの中身を格納しているディレクトリ内の
設定も行なう必要がある。
| HTMLの中身の入ったディレクトリの設定(httpd.conf) |
|---|
<Directory "/usr/local/apache2/phpmotion">
    #
    # Possible values for the Options directive are "None", "All",
    # or any combination of:
    #   Indexes Includes FollowSymLinks SymLinksifOwnerMatch ExecCGI MultiViews
    #
    # Note that "MultiViews" must be named *explicitly* --- "Options All"
    # doesn't give it to you.
    #
    # The Options directive is both complicated and important.  Please see
    # http://httpd.apache.org/docs/2.2/mod/core.html#options
    # for more information.
    #
    Options Indexes FollowSymLinks

    #
    # AllowOverride controls what directives may be placed in .htaccess files.
    # It can be "All", "None", or any combination of the keywords:
    #   Options FileInfo AuthConfig Limit
    #
    #AllowOverride All

    #
    # Controls who can get stuff from this server.
    #
    Order allow,deny
    Allow from all

</Directory>
|
本当は、これでは不十分なのだが、ここは充実に再現するため
敢えて、不十分な設定のまま話を進めます。
何の設定が不足しているのかについては後述しています。
|
 URLの指定で「index.html」の場合、ファイル名の指定は不要になる。
 「index.php」でもファイル名の指定を不要にする設定を行なう。
| index.phpでもファイル名の指定を不要にする(httpd.conf) |
|---|
#
# DirectoryIndex: sets the file that Apache will serve if a directory
# is requested.
#
<IfModule dir_module>
    DirectoryIndex index.php index.html
</IfModule>
|
|
赤い部分が追加した箇所だ。
|
次に、phpファイルの拡張子を認識してもらう設定だ。
| PHPとCGIファイルの拡張子の認識(httpd.conf) |
|---|
<IfModule mime_module>

途中、省略

    #
    # AddHandler allows you to map certain file extensions to "handlers":
    # actions unrelated to filetype. These can be either built into the server
    # or added with the Action directive (see below)
    #
    # To use CGI scripts outside of ScriptAliased directories:
    # (You will also need to add "ExecCGI" to the "Options" directive.)
    #
    AddHandler cgi-script .cgi

途中、省略


    #
    # To use php files
    #
    AddType application/x-httpd-php .php
    AddType application/x-httpd-php-source .phps

</IfModule>
|
そして青い部分はPHPファイルを認識させるための設定だ。
でも、これは不十分なのだが、それについては後述しています。
|
 これでApache2の設定は終わりだ。
 本当は、終わりではないが、この時は、これで良しと思ったのだ (^^)

phpmotion本体の設定

 いよいよphpmotionのインストールと設定だ。
 Webで誘導形式でインストール作業が行なわれるのだ。

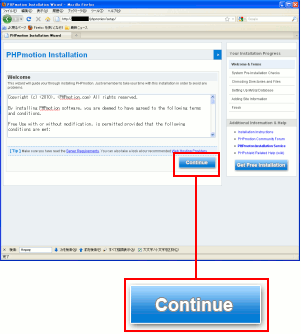
 以下のようにインストール画面に接続する。

 http://(IPアドレス)/

 すると以下の画面が出てくる。
| phpmotionのインストール開始 |
|---|
 |
|
「Continue」ボタンを押せば、次に進む。
|
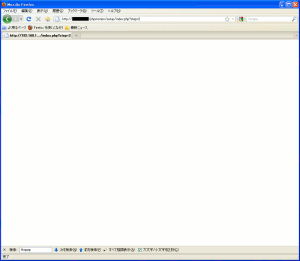
 だが・・・

 何も表示されへん (TT)
| 何も表示されない画面が出てきた |
|---|
 |
|
 そこで原因を調べていく事にした。
 画面が表示されていない所のURLを見てみる事にした。

 http://(IPアドレス)/setup/index.php?step=2

 そこでプログラムの中を見てみる事にした。
| setup/index.phpの中身を一部抜粋 |
|---|
<?php
//-----------------------------------------------------------------//
//
// PHPmotion Installation Wizard - Version 2
//
//-----------------------------------------------------------------//

include_once (dirname(__file__) . '/includes/config.php');
include_once (dirname(__file__) . '/includes/view.php');

$config_output = '532'; //the echo for testing phpshield (change this to anything else to see typical help output)

//___Set Welcome Visibility_____
$visibility = visibility('welcome');


if($_GET['step'] == 2) {

    //___Get Referrer url & add it to sessions____
    if($_SERVER['HTTP_REFERER'] == '') {
        $install_domain = siteBaseUrl();


(途中、省略)


}


(以下、省略)
|
青く囲んだ「step=2」の処理部分(ほとんど省略していますが)で
エラーを起こしているのだが、どこでエラーが発生しているのか
全く見当がつかない。
|
 事務員だから、わからなくて当然というネタで逃げても問題は解決しない。

 でも、こんな時は便利な発見方法がある。

 die()関数を使うのらー (^^)

 適当な場所にdie("OK");を記述して
ブラウザで「OK」が出現しなくなる場所を探せば良いのだ
 出現しなくなる場所が、エラーを起こしている場所になるからだ。

 すると発見した。
| setup/index.phpの125行目辺り |
|---|
	if(checkingINI('allow_url_fopen')) {
    		$check_phpshield = file_get_contents($phpshield_check_url);
		$phpshield_proceed = true;
    	}
|
赤い部分の独自関数(curl_get_file_contents)でエラーを起こしているようだ。
この独自関数を定義している場所を探せば良いのだ。
|
そこで独自関数(curl_get_file_contents)を探すと、同じソースの中にあった。
| setup/index.phpの中身の最後の部分 |
|---|
function curl_get_file_contents($URL)
{
      $c = curl_init();
      curl_setopt($c, CURLOPT_RETURNTRANSFER, 1);
      curl_setopt($c, CURLOPT_URL, $URL);
      $contents = curl_exec($c);
      curl_close($c);

      if ($contents) return $contents;
      else return FALSE;

}

?>
|
この独自関数を調べてみると、赤い部分でコケるのがわかった。
PHPの関数の1つなのだ。
|
 PHPの関数の関数なのだが、なぜエラーが出るだろうかと調べると
ライブラリ依存のある関数なのだ。
 そのため、PHPのコンパイル時に・・・

 --with-curl オプションが必要なのらー!!

 という事で、PHPのインストールをやり直す事にした。
 configureの際、以下のようにオプションを書き換えた。
| configureを行なう |
|---|
configure --with-apxs2=/usr/local/apache2/bin/apxs --disable-ipv6
          --with-zlib --with-bz2 --with-gd --enable-mbstring
          --with-mysql --enable-bcmath --with-curl
|
青い部分が追加したオプション。
(注意1)
見やすいように改行をいれていますが、実際は改行はしません。
|
 configureの後の、makeでコンパイルなどのインストール作業は省略します。

 ところで・・・

 cURLって何やねん!!

 なのだ。

 そこでcURLを調べていくのだが、紛らわしい問題があるのに気づく。

 curlとcURLの区別が厄介なのらー (--;;

 同じ綴りだとgoogleなどで検索する時は厄介だ。
 小文字、大文字の区別なく、検索してしまうからだ。
| curlとcURLの違い |
|---|
| curl |
プログラム言語
Webアプリケーションを書くための言語だという。
|
| cURL |
データ転送を行なうための道具。
URLに関する関数群のようだ
「Client for URLs」の略みたいで、URLに関する物だ。
|
 うーん、cURLなのだが、わかったような、わからんような。
 こんなモヤモヤしている時は「わかっていない」のが明白なのだ。

 とはいえ、curlとcURLとは、別物だというのを知った。


 気を取り直してPHPmotionのインストールを進めるのだが

 またエラーが出た (TT)
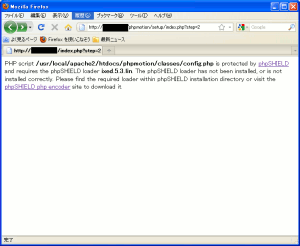
| phpSHILDが入っていないというエラー |
|---|
 |
| エラーの内容(拡大) |
PHP script /usr/local/apache2/htdocs/phpmotion/classes/config.php is
protected by phpSHIELD and requires the phpSHIELD loader ixed.5.3.lin.
The phpSHIELD loader has not been installed, or is not installed correctly.
Please find the required loader within phpSHIELD installation
directory or visit the phpSHIELD php encoder site to download it.
|
 「ixed.5.3.lin」がインストールされていないというエラーなのだ。

 だが、phpSHIELDを読み込む「ixed.5.3.lin」は
PHPmotionのソース群の中に含まれているのだ。
PHPmotionを展開した際
phpSHIELDがあるディレクトリ |
|---|
[root@linux]# pwd
/usr/local/apache2/htdocs/phpmotion/phpshield/Linux_x86-32
[root@linux]# ls
ixed.4.3.lin    ixed.5.0.0.lin    ixed.5.0.2.lin    ixed.5.1.lin    ixed.5.3.lin
ixed.4.3ts.lin  ixed.5.0.0ts.lin  ixed.5.0.2ts.lin  ixed.5.1ts.lin  ixed.5.3ts.lin
ixed.4.4.lin    ixed.5.0.1.lin    ixed.5.0.lin      ixed.5.2.lin
ixed.4.4ts.lin  ixed.5.0.1ts.lin  ixed.5.0ts.lin    ixed.5.2ts.lin
[root@linux]#
|
 そこで調べてみると、phpの付属ライブラリとして
所定のディレクトリーに入れる必要があるというのだ。
| 所定のディレクトリに入れる |
|---|
[root@linux]# cp ixed.5.3.lin /usr/local/lib/php/extensions/
[root@linux]#
|
PHPなのだが、バージョンが5.3.6なのだ。
そしてソースコンパイルしているのだ。
もし、RPMでPHPをインストールした場合は
必ずしも、このディレクトリとはいえないので注意が必要だ。
|
 これでうまくいくかなぁと思いきや・・・

 まだアカン エラーが出る (TT)

 だった。
 どうやらPHP側の設定を行なう必要があるのだ。
| php.iniに追加 |
|---|
extension=ixed.5.3.lin
|
|
外部ライブラリを取り込む設定だ。
|
 これでうまくいくかなぁと思いきや・・・

 まだアカン エラーが出る (TT)

 だった。
 どうやらディレクトリは絶対パスでないと駄目みたい。
| php.iniを修正 |
|---|
extension=/usr/local/lib/php/extensions/ixed.5.3.lin
|
外部ライブラリの指定は、絶対パスが必要みたいだ。
ただし、phpはソースコンパイルなので
インストールの際のライブラリを置くディレクトリの設定や
RPMでのインストールによって、ディレクトリの場所は
異なる事があります。
|
 そして・・・

 エラーがなくなった (^^)

 だった。

 次に進む事にした。
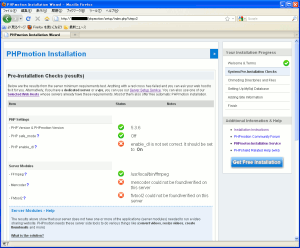
| インストール前の点検 |
|---|
 |
| 拡大図 |
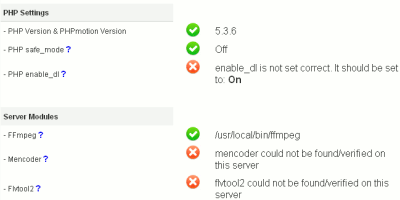 |
PHPのバージョン、セーフモードの問い合わせ。
そして動画関連のffmpeg、Mencoder、Flvtool2の有無だ。

Mencoder、flvtool2がなくても大丈夫だと思って
次へ進める事にした。
|
 次に進めるのだが・・・

 エラーが出た (TT)
| エラー表示 |
|---|
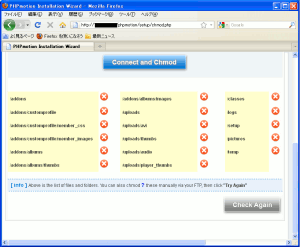 |
PHPmotionを展開した時の各ディレクトリーに対して
処理を施すのだが、パーミッションの設定が
許可になっていないため、エラーが出てしまうのだ
|
 そこで各ディレクトリやファイルの権限の設定を
行なう事にした。
| 各ディレクトリのパーミッションの変更 |
|---|
chmod 777 addons/
chmod 777 addons/customprofile/
chmod 777 addons/customprofile/
chmod 777 addons/customprofile/member_css/
chmod 777 addons/customprofile/member_images/
chmod 777 addons/albums/
chmod 777 addons/albums/images/
chmod 777 addons/albums/thumbs/
chmod 777 classes/
chmod 777 logs/
chmod 777 pictures/
chmod 777 temp/
chmod 777 uploads
chmod 777 uploads/avi
chmod 777 uploads/thumbs
chmod 777 uploads/audio
chmod 777 uploads/player_thumbs
chmod 777 setup
chmod 755 cgi-bin
chmod 755 cgi-bin/audio/uu_default_config.pm
chmod 755 cgi-bin/audio/uu_ini_status.pl
chmod 755 cgi-bin/audio/uu_lib.pm
chmod 755 cgi-bin/audio/uu_upload.pl
|
 各ディレクトリーや実行ファイルの権限を変更した所で
再度、インストール作業を進める。
| パーミッションに問題がない場合 |
|---|
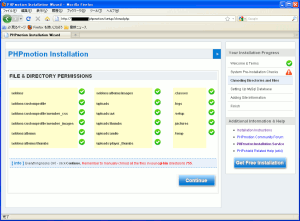 |
 これでインストール作業が前に進められる。

 次にMySQLへの接続関連の設定だ。
| MySQLへの接続関連の設定 |
|---|
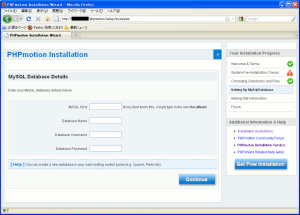 |
| 拡大図 |
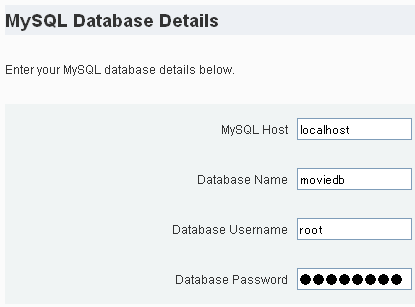 |
接続するMySQLのマシン名(もしくはIPアドレス)。
今回は、同じマシン上なので「localhost」にした。
そして接続先のデータベース名の指定。
データベースの所有者のIDとパスワードなのだ。
|
 次へ進める。
 PHPmotionの管理者の設定を行なう画面になる。
| 管理者の設定画面 |
|---|
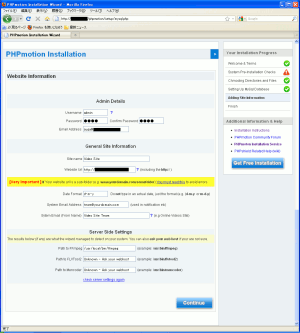 |
| 拡大図 |
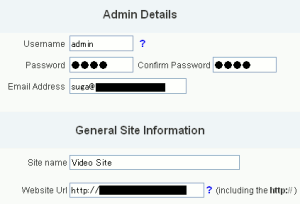 |
管理者名(ID)、パスワード、管理者の連絡先メールアドレス。
PHPmotionを公開した時のURLの指定を行なう。
|
次に進むと、インストール完了の画面になる。
| PHPmotionのインストール完了の画面 |
|---|
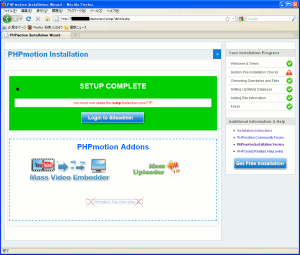 |
 これでPHPmotionのインストール完了だ。

 これで終わった (^^)

 と思ったのだが、まだ終わりではなかった。
 「Continue」のボタンを押すと・・・

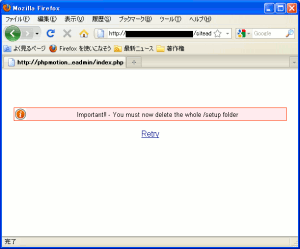
 警告が出たのだ (--;;

 といっても、厄介な物ではなかった。
| インストール完了後に出てきた警告画面 |
|---|
 |
| 警告内容の拡大 |
|
Important!! - You must now delete the whole /setup folder
|
要するにインストールに使ったファイルなどは
完全に消去しなさいという意味なのだ。
|
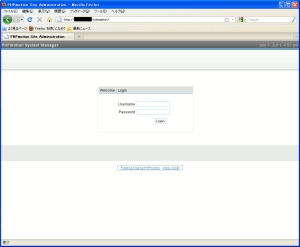
 というわけで不要なディレクトリを完全に消去した。

 すると管理者画面が出てくるのだ。
| 管理者用のログイン画面 |
|---|
 |
 これでやれやれと思ったのだが、実は、終わりではなかった。
 不備だらけのインストールや設定を行なったため
それの修正が必要だったのだ。


不備な点の修正作業

 この時点では、まだ終わりじゃなかったのだが
インストール完了だと思い込んでいた私。

 さて、PHPmotionのトップページを開いてみる。
| PHPmotionのトップページ |
|---|
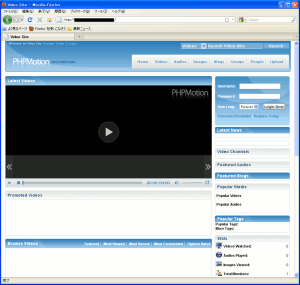 |
|
さて、早速、動画のアップロードをしてみる事にした。
| 動画のアップロードについて |
|---|
実は、初期状態ではアップロードはできません。
管理者画面にログインして操作する必要があるのだが
ここでは割愛します。
|
 だが・・・

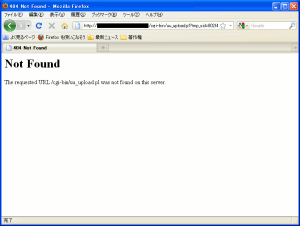
 なんでエラーが出るねん・・・ (TT)
| PHPmotionのCGIエラー |
|---|
 |
| エラー内容を拡大 |
Not Found

The requested URL /cgi-bin/uu_upload.pl was not found on this server.
|
CGI専用のディレクトリに、uu_upload.plファイルが
が見つからないというエラーだ。
|
 どうやらCGIのディレクトリ設定に問題があるようだ。
 そこでapacheの設定ファイルを以下のように変更した。
| Apacheの設定ファイル httpd.confの記述を変更 |
|---|
| 変更前 |
<IfModule alias_module>
    #
    # Redirect: Allows you to tell clients about documents that used to
    # exist in your server's namespace, but do not anymore. The client
    # will make a new request for the document at its new location.
    # Example:
    # Redirect permanent /foo http://www.example.com/bar

    #
    # Alias: Maps web paths into filesystem paths and is used to
    # access content that does not live under the DocumentRoot.
    # Example:
    # Alias /webpath /full/filesystem/path
    #
    # If you include a trailing / on /webpath then the server will
    # require it to be present in the URL.  You will also likely
    # need to provide a <Directory> section to allow access to
    # the filesystem path.

    #
    # ScriptAlias: This controls which directories contain server scripts.
    # ScriptAliases are essentially the same as Aliases, except that
    # documents in the target directory are treated as applications and
    # run by the server when requested rather than as documents sent to the
    # client.  The same rules about trailing "/" apply to ScriptAlias
    # directives as to Alias.
    #
    ScriptAlias /cgi-bin/ "/usr/local/apache2/cgi-bin/"

</IfModule>
|
| 変更後 |
ScriptAlias /cgi-bin/ "/usr/local/apache2/phpmotion/cgi-bin/"
|
CGIの実行ファイルのディレクトリをPHPmotionが用意している
CGIのディレクトリを指定。

(注意)

環境によって絶対パスの設定が変わります。
私の場合、ソースコンパイルで比較的、初期状態のままで
設定していますので、上のようなディレクトリになりました。
|
 それだけでなく、CGIを動かせるようにApacheの設定ファイルの
httpd.confで、他の箇所の変更も行なった。

 まずはCGIを許可する設定だ。
| CGIを使えるようにする設定(httpd.conf) |
|---|
| 変更前 |
<Directory "/usr/local/apache2/phpmotion">
    #
    # Possible values for the Options directive are "None", "All",
    # or any combination of:
    #   Indexes Includes FollowSymLinks SymLinksifOwnerMatch ExecCGI MultiViews
    #
    # Note that "MultiViews" must be named *explicitly* --- "Options All"
    # doesn't give it to you.
    #
    # The Options directive is both complicated and important.  Please see
    # http://httpd.apache.org/docs/2.2/mod/core.html#options
    # for more information.
    #
    Options Indexes FollowSymLinks

    #
    # AllowOverride controls what directives may be placed in .htaccess files.
    # It can be "All", "None", or any combination of the keywords:
    #   Options FileInfo AuthConfig Limit
    #
    #AllowOverride All

    #
    # Controls who can get stuff from this server.
    #
    Order allow,deny
    Allow from all

</Directory>
|
| 変更後 |
<Directory "/usr/local/apache2/phpmotion">
    #
    # Possible values for the Options directive are "None", "All",
    # or any combination of:
    #   Indexes Includes FollowSymLinks SymLinksifOwnerMatch ExecCGI MultiViews
    #
    # Note that "MultiViews" must be named *explicitly* --- "Options All"
    # doesn't give it to you.
    #
    # The Options directive is both complicated and important.  Please see
    # http://httpd.apache.org/docs/2.2/mod/core.html#options
    # for more information.
    #
    Options Indexes FollowSymLinks ExecCGI

    #
    # AllowOverride controls what directives may be placed in .htaccess files.
    # It can be "All", "None", or any combination of the keywords:
    #   Options FileInfo AuthConfig Limit
    #
    #AllowOverride All

    #
    # Controls who can get stuff from this server.
    #
    Order allow,deny
    Allow from all

</Directory>
|
 そしてCGIのプログラム言語でPerlなどを使えるようにする設定だ。
 CGIのファイルの拡張子を認識させる設定だ。
| httpd.confの書き換え |
|---|
| 変更前 |
    # To use CGI scripts outside of ScriptAliased directories:
    # (You will also need to add "ExecCGI" to the "Options" directive.)
    #
    AddHandler cgi-script .cgi
|
| 変更後 |
    # To use CGI scripts outside of ScriptAliased directories:
    # (You will also need to add "ExecCGI" to the "Options" directive.)
    #
    AddHandler cgi-script .cgi .pl .pm
|
 気を取り直して動画をアップロードするが

 エラーが出た (TT)

 動画をアップロードする際、アップロードするファイルの大きさが問題だ。
 PHPの設定ファイル(php.ini)で、データ送信可能な量と
ファイルの大きさの変更が必要なのだ。
| POSTでデータ送信できる容量の変更 |
|---|
| 変更前 |
; Maximum size of POST data that PHP will accept.
; http://php.net/post-max-size
post_max_size = 8M
|
| 変更後 |
; Maximum size of POST data that PHP will accept.
; http://php.net/post-max-size
post_max_size = 208M
|
 8Mバイトから、208Mバイトに変更したのだ。
 そしてアップロードできる量も変更する。
| アップロードできるデータ容量の変更 |
|---|
| 変更前 |
; Maximum allowed size for uploaded files.
; http://php.net/upload-max-filesize
upload_max_filesize = 2M
|
| 変更後 |
; Maximum allowed size for uploaded files.
; http://php.net/upload-max-filesize
upload_max_filesize = 208M
|
 ここは2Mバイトから208Mバイトにしたのだ。
 208Mバイトにしたのは、特に意味もなく、単に思いつきです。

 この時は知らなかったのだが、場合によっては
PHPmotionの設定を触る必要が出てくる事もあるのだ。
 cgi-binのディレクトリにあるuu_default_config.pmファイルだ。
 それについては後述しています。


 気を取り直して動画をアップロードする。
 すると・・・

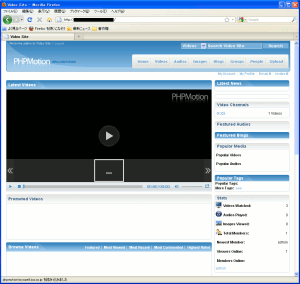
 アップロード成功 (^^)

 だった。
| 動画をアップロード後の画面 |
|---|
 |
| 拡大図 |
 |
youtubeのように挿絵の表示が出てこない。
原因は、flvtool2をインストールしていないためだ。
でも、動画の再生は問題なく行なえたのだ (^^)
|
 これで安心だと思ったが、世の中そんなに甘くない。

 次の部分をクリックした。
| クリックした場所 |
|---|
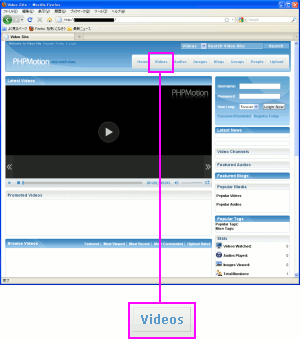 |
「videos」をクリックして、動画の一覧を出してみる事にした。
余談になるけど、複数形になっているのが英語らしい (^^)
|
 すると・・・

 エラーが出た (TT)
| エラーの内容 |
|---|
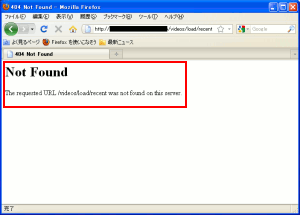 |
| エラー内容の拡大 |
Not Found
The requested URL /videos/load/recent was not found on this server.
|
該当のディレクトリが見つからないというエラーだ。
でも、どうして見つからないのか見当がつかない・・・
|
 そこで調べてみる。
  .htaccessファイルの記述を読み込ませるために
Apacheの設定ファイル(httpd.conf)を触る必要があるというのだ。
| .htaccessファイルを読み込ませる設定(httpd.conf) |
|---|
| 変更前 |
<Directory "/usr/local/apache2/phpmotion">
    #
    # Possible values for the Options directive are "None", "All",
    # or any combination of:
    #   Indexes Includes FollowSymLinks SymLinksifOwnerMatch ExecCGI MultiViews
    #
    # Note that "MultiViews" must be named *explicitly* --- "Options All"
    # doesn't give it to you.
    #
    # The Options directive is both complicated and important.  Please see
    # http://httpd.apache.org/docs/2.2/mod/core.html#options
    # for more information.
    #
    Options Indexes FollowSymLinks ExecCGI

    #
    # AllowOverride controls what directives may be placed in .htaccess files.
    # It can be "All", "None", or any combination of the keywords:
    #   Options FileInfo AuthConfig Limit
    #
    #AllowOverride All

    #
    # Controls who can get stuff from this server.
    #
    Order allow,deny
    Allow from all

</Directory>
|
| 変更後 |
<Directory "/usr/local/apache2/phpmotion">
    #
    # Possible values for the Options directive are "None", "All",
    # or any combination of:
    #   Indexes Includes FollowSymLinks SymLinksifOwnerMatch ExecCGI MultiViews
    #
    # Note that "MultiViews" must be named *explicitly* --- "Options All"
    # doesn't give it to you.
    #
    # The Options directive is both complicated and important.  Please see
    # http://httpd.apache.org/docs/2.2/mod/core.html#options
    # for more information.
    #
    Options Indexes FollowSymLinks ExecCGI

    #
    # AllowOverride controls what directives may be placed in .htaccess files.
    # It can be "All", "None", or any combination of the keywords:
    #   Options FileInfo AuthConfig Limit
    #
    AllowOverride All

    #
    # Controls who can get stuff from this server.
    #
    Order allow,deny
    Allow from all

</Directory>
|
 Apacheを再起動させた。
 だが・・・

 今度は別のエラーが出るやん・・・ (TT)
| 出てきたエラーの内容 |
|---|
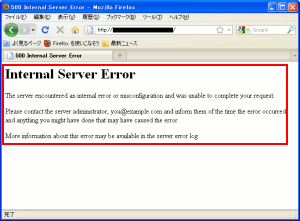 |
| エラー内容の拡大 |
Internal Server Error

The server encountered an internal error or misconfiguration
and was unable to complete your request.

Please contact the server administrator, you@example.com and
inform them of the time the error occurred,
and anything you might have done that may have caused the error.

More information about this error may be available
in the server error log.
|
英語のエラーなので、読む気が起こらない・・・ (--;;
とりあえずログファイルの「error_log」を読んでみてと
書いているのだ。
|
 わけのわからんエラーだなぁと思った。
 そこでApacheのログファイルを見る。
| ログファイルの内容(error_log) |
|---|
[Sat Jul 02 11:40:01 2011] [notice] caught SIGTERM, shutting down
[Sat Jul 02 11:40:03 2011] [notice] Apache/2.2.19 (Unix) PHP/5.3.6 configured -- resuming normal operations
[Sat Jul 02 11:40:09 2011] [alert] [client 192.168.X.Y] /usr/local/apache2/htdocs/phpmotion/
.htaccess: Invalid command 'RewriteEngine', perhaps misspelled or defined by a module not included in the server configuration
[Sat Jul 02 11:40:10 2011] [alert] [client 192.168.X.Y] /usr/local/apache2/htdocs/phpmotion/
.htaccess: Invalid command 'RewriteEngine', perhaps misspelled or defined by a module not included in the server configuration
|
RewriteEngineに関して、エラーが出ているようだ。
おそらく「.htaccess」の記述を有効にする方法が必要みたいだ。
|
 調べてみると、Apacheのコンパイル時に、モジュールとして
Rewriteを取り込む必要があり、コンパイル時にオプションが必要になる。

 そこで、Apacheのコンパイルを行なう事になった。
| Apacheの再コンパイルのためconfigureを行なう |
|---|
configure --enable-rewrite
|
赤い部分が追加したオプションだ。
これを追加する事で「Rewrite」を有効にするのだ。
|
 コンパイル後、試してみると、エラーが解消された (^^)

PHPmotionの日本語バッチ

 さてさて、これで終わったわけではない。

 日本語化の作業があるのらー!!

 英語と無縁の社員が大半なので、少しでも英語があると
そこで止まってしまう。
 でも、表示を日本語に変えるパッチがある。

 PHPmotion/日本語化ファイル

 ダウンロードする。zip形式のファイルなのだ。
 展開すると「japanese.php」が表れる。
 色々、日本語の設定を行なうみたいなのだが
めんどくさいので、英語版のファイル上に、そのまま上書きしてしまう。
英語版の実行のファイルに
日本語版の実行のファイルを上書きする。 |
|---|
[root@linux]# cd lang
[root@linux]# ls
english.php  japanese.php
[root@linux]#
[root@linux]# cp japanese.php english.php
cp: `english.php' を上書きしてもよろしいですか(yes/no)? yes
[root@linux]#
|
langディレクトリに各言語の表示を司るファイルが保管されている。
japanese.phpには、日本語の表示やコメントのデータが入っている。
色々、触るのが面倒なので、英語版を上書きしたのだ。
|
 そしてPHPの設定ファイルで文字コードの処理を行なう必要がある。
 出力ハンドラーの設定なのだ。
| PHP.iniの設定(出力ハンドラー) |
|---|
| 変更前 |
; Note: You cannot use both "mb_output_handler" with "ob_iconv_handler"
;   and you cannot use both "ob_gzhandler" and "zlib.output_compression".
; Note: output_handler must be empty if this is set 'On' !!!!
;   Instead you must use zlib.output_handler.
; http://php.net/output-handler
;output_handler =
|
| 変更後 |
; Note: You cannot use both "mb_output_handler" with "ob_iconv_handler"
;   and you cannot use both "ob_gzhandler" and "zlib.output_compression".
; Note: output_handler must be empty if this is set 'On' !!!!
;   Instead you must use zlib.output_handler.
; http://php.net/output-handler
output_handler = mb_output_handler
|
 ところで・・・

 出力ハンドラーって何やねん?

 なのだ。
 文字コードの変換に必要な設定という事で、何も考えずに
今まで本やサイトの丸写しで、この設定を行なったのだが

 なぜ、この設定をするねん?

 と問われても答えられない・・・ (^^;;
 だけど、調べると、相当、時間がとられそうなので
忍法「先送りの術」で封印して、機会がある時に取り上げます。


 MySQLのデータ内部がUTF-8なので、データ処理に関する
文字コードをUTF-8に合わせる。
| PHP.iniの設定(文字コードの設定) |
|---|
| 変更前 |
[mbstring]
; language for internal character representation.
; http://php.net/mbstring.language
;mbstring.language = Japanese
; internal/script encoding.
; Some encoding cannot work as internal encoding.
; (e.g. SJIS, BIG5, ISO-2022-*)
; http://php.net/mbstring.internal-encoding
;mbstring.internal_encoding = EUC-JP
; http input encoding.
; http://php.net/mbstring.http-input
;mbstring.http_input = auto
; http output encoding. mb_output_handler must be
; registered as output buffer to function
; http://php.net/mbstring.http-output
;mbstring.http_output = SJIS
; enable automatic encoding translation according to
; mbstring.internal_encoding setting. Input chars are
; converted to internal encoding by setting this to On.
; Note: Do _not_ use automatic encoding translation for
; portable libs/applications.
; http://php.net/mbstring.encoding-translation
;mbstring.encoding_translation = Off
; automatic encoding detection order.
; auto means
; http://php.net/mbstring.detect-order
;mbstring.detect_order = auto
; substitute_character used when character cannot be converted
; one from another
; http://php.net/mbstring.substitute-character
;mbstring.substitute_character = none;
; overload(replace) single byte functions by mbstring functions.
; mail(), ereg(), etc are overloaded by mb_send_mail(), mb_ereg(),
; etc. Possible values are 0,1,2,4 or combination of them.
; For example, 7 for overload everything.
; 0: No overload
; 1: Overload mail() function
; 2: Overload str*() functions
; 4: Overload ereg*() functions
; http://php.net/mbstring.func-overload
;mbstring.func_overload = 0
; enable strict encoding detection.
;mbstring.strict_detection = Off
; This directive specifies the regex pattern of content types for which mb_output_handler()
; is activated.
; Default: mbstring.http_output_conv_mimetype=^(text/|application/xhtml\+xml)
;mbstring.http_output_conv_mimetype=
; Allows to set script encoding. Only affects if PHP is compiled with --enable-zend-multibyte
; Default: ""
;mbstring.script_encoding=
|
| 変更後 |
[mbstring]
; language for internal character representation.
; http://php.net/mbstring.language
mbstring.language = Japanese
; internal/script encoding.
; Some encoding cannot work as internal encoding.
; (e.g. SJIS, BIG5, ISO-2022-*)
; http://php.net/mbstring.internal-encoding
mbstring.internal_encoding = UTF-8
; http input encoding.
; http://php.net/mbstring.http-input
mbstring.http_input = auto
; http output encoding. mb_output_handler must be
; registered as output buffer to function
; http://php.net/mbstring.http-output
mbstring.http_output = UTF-8
; enable automatic encoding translation according to
; mbstring.internal_encoding setting. Input chars are
; converted to internal encoding by setting this to On.
; Note: Do _not_ use automatic encoding translation for
; portable libs/applications.
; http://php.net/mbstring.encoding-translation
mbstring.encoding_translation = On
; automatic encoding detection order.
; auto means
; http://php.net/mbstring.detect-order
mbstring.detect_order = auto
; substitute_character used when character cannot be converted
; one from another
; http://php.net/mbstring.substitute-character
;mbstring.substitute_character = none;
; overload(replace) single byte functions by mbstring functions.
; mail(), ereg(), etc are overloaded by mb_send_mail(), mb_ereg(),
; etc. Possible values are 0,1,2,4 or combination of them.
; For example, 7 for overload everything.
; 0: No overload
; 1: Overload mail() function
; 2: Overload str*() functions
; 4: Overload ereg*() functions
; http://php.net/mbstring.func-overload
;mbstring.func_overload = 0
; enable strict encoding detection.
;mbstring.strict_detection = Off
; This directive specifies the regex pattern of content types for which mb_output_handler()
; is activated.
; Default: mbstring.http_output_conv_mimetype=^(text/|application/xhtml\+xml)
;mbstring.http_output_conv_mimetype=
; Allows to set script encoding. Only affects if PHP is compiled with --enable-zend-multibyte
; Default: ""
;mbstring.script_encoding=
|
赤い部分は先頭の「;」を省いて有効にした箇所。
青い部分は設定の記述を変更した箇所。
|
これでPHPの文字コード処理の設定も完了した。
そして日本語パッチを当てたPHPmotionを開いてみた。
| 日本語の画面になった |
|---|
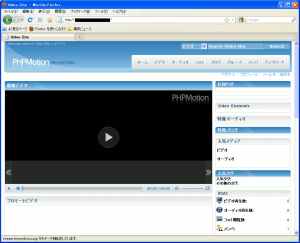 |
これで動画配信サイトが構築できたのだ (^^)
再度、PHPmotionのインストールを行なう
なんとかPHPmotionをインストールした物の、不備が目立つ上、
なんだか気分的にも、すっきりしない。
というわけで、知識の整理を兼ねて、再度、インストールを
行なってみる事にした。
既にインストール手順は掴んでいる。
| PHPmotionインストールの手順 |
|---|
| (1) |
yasmのインストール |
| (2) |
各種コーデックのインストール |
| (3) |
flvtool2のインストール |
| (4) |
ffmpegのインストール |
| (5) |
mplayerのインストール |
| (6) |
Apacheのインストール |
| (7) |
MySQLのインストール |
| (8) |
PHPのインストール |
| (9) |
ffmpeg-phpのインストール |
| (10) |
MySQLの起動と設定 |
| (11) |
PHPmotionのインストール |
という手順になる。
そのため、最初からCentOS5.6をインストールを行なって
PHPmotionのインストールを行なう事にした。
yasmのインストール
各種コーデックのインストールを行なう前に
x264コーデックのコンパイルを行なうために
アセンブラを機械語に翻訳するyasmをインストールする。
| yasmを展開 |
|---|
[root@linux]# tar xvfz yasm-1.1.0.tar.gz
yasm-1.1.0/
yasm-1.1.0/config.h.in
(途中、省略)
yasm-1.1.0/ABOUT-NLS
yasm-1.1.0/libyasm.h
[root@linux]# cd yasm-1.1.0
[root@linux]#
|
そしてconfigureを行なう。
| configureを行なう。 |
|---|
[root@linux]# ./configure
checking for a BSD-compatible install... /usr/bin/install -c
checking whether build environment is sane... yes
(途中、省略)
config.status: creating po/POTFILES
config.status: creating po/Makefile
[root@linux]#
|
とりあえずインストールしてみた時はオプションを付けたが
実際には、付ける必要がないので、付けなかった。
|
そしてコンパイルなのだ。
| コンパイルを行なう |
|---|
[root@linux]# make
gcc -std=gnu99 -I. \
-c -o genperf.o `test -f tools/genperf/genperf.c || echo './'`tools/genperf/genperf.c
gcc -std=gnu99 -I. \
(途中、省略)
gcc -std=gnu99 -g -O2 -o vsyasm vsyasm.o yasm-options.o libyasm.a
make[2]: ディレクトリ `/usr/local/src/yasm-1.1.0' から出ます
make[1]: ディレクトリ `/usr/local/src/yasm-1.1.0' から出ます
[root@linux]#
|
そしてインストールを行なう。
| yasmのインストール |
|---|
[root@linux]# make install
make install-recursive
make[1]: ディレクトリ `/usr/local/src/yasm-1.1.0' に入ります
(途中、省略)
make[2]: ディレクトリ `/usr/local/src/yasm-1.1.0' から出ます
make[1]: ディレクトリ `/usr/local/src/yasm-1.1.0' から出ます
[root@linux]#
|
だが、このままではyasmのインストールした際に
/usr/local/libディレクトリに保管された
yasmの共有ライブラリを認識する事ができない。
というより、CentOS5系では、/usr/local/libが
共有ライブラリ保管場所という設定になっていない。
そこでライブラリ登録を行なう必要があるのだ。
| ディレクトリ移動 |
|---|
[root@linux]# cd /etc/ld.so.conf.d/
[root@linux]#
|
そして、このディレクトリ内にlocal.confファイルを追加するのだ。
| local.confを追加 |
|---|
| ファイルの中身 |
/usr/local/lib
|
| 追加後 |
[root@linux]# ls
local.conf qt-i386.conf xulrunner-32.conf
mysql-i386.conf vmware-tools-libraries.conf
[root@linux]#
|
そして追加したファイルの内容を有効にするために
以下のコマンドを打つ。
| ldconfigコマンドを入力 |
|---|
[root@linux]# ldconfig
[root@linux]#
|
ところで・・・
ldconfigって何やねん!
いくらシステム奮闘記の連載を重ねて、知識を増やしても
知らない事は知らない。見栄を張ってメッキが剥がれた方が
格好悪いので、最初から「知らない」と言った方が良いのだ (^^)
調べてみると、以下の事だった。
| ldconfigコマンドとは |
|---|
共有ライブラリの保管場所を記録したファイル(ld.so.cache)を
更新するためのコマンドだ。
|
知らなかった。
だが、その前に・・・
共有ライブラリの保存場所の設定そのものを
知らなかったのらー (^^;;
なので、/etc/ld.so.confファイルや、
/etc/ld.so.conf.d/ディレクトリの事なんぞ
全く知らなかったのだ。
これで少しは賢くなった (^^)
そしてコーデックのインストールを行なう事にした。
各種コーデックのインストール
まずは各種コーデックのインストールを行なう。
以下の順番は、あくまでも私が行なった順番であって
特に決まっているわけでないので、好きな順番で行なえます。
| 各種コーデックのインストール |
|---|
| (1) |
FAAD2のインストール |
| (2) |
FAACのインストール |
| (3) |
opencore-amrのインストール |
| (4) |
vo-amrwbencのインストール |
| (5) |
GMSのインストール |
| (6) |
LAMEのインストール |
| (7) |
lcms2のインストール。コーデックではないが
openjpegのオプションに使えば良いみたい |
| (8) |
OpenJPEGのインストール |
| (9) |
Theoraのインストール |
| (10) |
x264のインストール |
| (11) |
Xvidのインストール |
| (12) |
WebMのインストール |
というわけでコーデックのインストールを開始する。
| コーデックについて |
|---|
コーデックのついて、より突っ込んだ内容を書く予定でしたが
量が多く、とても編集しきれないため、別の機会に書く事にしました。
そのため、ここでは簡単にインストールの方法の話だけにしました。
|
faad2のインストール
以下のサイトからfaad2をダウンロードする。
AudioCoding.com FAAD2/FAAC
まずはfaad2の展開を始める。
| faad2の展開 |
|---|
[root@linux]# tar xvfz faad2-2.7.tar.gz
faad2-2.7/
faad2-2.7/ChangeLog
faad2-2.7/AUTHORS
faad2-2.7/COPYING
faad2-2.7/aacDECdrop/
(途中、省略)
faad2-2.7/INSTALL
faad2-2.7/Makefile.in
[root@linux]#
[root@linux]# cd faad2-2.7
|
そしてconfigureを行なう。
| configureを行なう |
|---|
[root@linux]# ./configure --with-mp4v2
checking for a BSD-compatible install... /usr/bin/install -c
checking whether build environment is sane... yes
(途中、省略)
config.status: creating config.h
config.status: executing depfiles commands
[root@linux]#
|
Linux上にfaac2をインストールする方法で
README.linuxファイルに「--with-mp4v2」オプションを
付けるように書いている。
|
そしてコンパイルを行なう。
| コンパイル |
|---|
[root@linux]# make
make all-recursive
make[1]: ディレクトリ `/usr/local/src/codec/faad2-2.7' に入ります
Making all in libfaad
make[2]: ディレクトリ `/usr/local/src/codec/faad2-2.7/libfaad' に入ります
(途中、省略)
make[2]: ディレクトリ `/usr/local/src/codec/faad2-2.7' から出ます
make[1]: ディレクトリ `/usr/local/src/codec/faad2-2.7' から出ます
[root@linux]#
|
そしてmake installでインストールすれば完成。
faacのインストール
以下のサイトからfaacをダウンロードする。
AudioCoding.com FAAD2/FAAC
次にfaacのコンパイルを行なうため、faacの展開を行なう。
| faacの展開 |
|---|
[root@linux]# tar xvfz faac-1.28.tar.gz
faac-1.28/
faac-1.28/common/
faac-1.28/common/Cfaac/
(途中、省略)
faac-1.28/depcomp
faac-1.28/Makefile.in
[root@linux]# cd faac-1.28
[root@linux]#
|
そしてconfigureを行なう。
| configureを行なう |
|---|
[root@linux]# ./configure
checking for a BSD-compatible install... /usr/bin/install -c
checking whether build environment is sane... yes
(途中、省略)
config.status: linking ./config.h to common/mp4v2/mpeg4ip_config.h
config.status: executing depfiles commands
[root@linux]#
|
そしてコンパイルを行なう。
| コンパイルを行なう |
|---|
[root@linux]# make
make all-recursive
make[1]: ディレクトリ `/usr/local/src/codec/faac-1.28' に入ります
Making all in include
make[2]: ディレクトリ `/usr/local/src/codec/faac-1.28/include' に入ります
(途中、省略)
make[2]: ディレクトリ `/usr/local/src/codec/faac-1.28' から出ます
make[1]: ディレクトリ `/usr/local/src/codec/faac-1.28' から出ます
[root@linux]#
|
そしてインストールを行なう。
| インストールを行なう |
|---|
[root@linux]# make install
Making install in include
make[1]: ディレクトリ `/usr/local/src/codec/faac-1.28/include' に入ります
make[2]: ディレクトリ `/usr/local/src/codec/faac-1.28/include' に入ります
(途中、省略)
make[2]: ディレクトリ `/usr/local/src/codec/faac-1.28' から出ます
make[1]: ディレクトリ `/usr/local/src/codec/faac-1.28' から出ます
[root@linux]#
|
opencore-amrのインストール
次にopencore-amrのインストールを行なう。
以下のサイトからダウンロードをする。
opencore-amr
まずは展開から行なう。
| 展開作業 |
|---|
root@linux]# tar xvfz opencore-amr-0.1.2.tar.gz
opencore-amr-0.1.2/
opencore-amr-0.1.2/aclocal.m4
opencore-amr-0.1.2/amrnb/
(途中、省略)
opencore-amr-0.1.2/oscl/oscl_mem.h
opencore-amr-0.1.2/oscl/oscl_base.h
[root@linux]#
[root@linux]# cd opencore-amr-0.1.2
[root@linux]#
|
そしてconfigureを行なう。
| configureを行なう |
|---|
[root@linux]# ./configure
checking for a BSD-compatible install... /usr/bin/install -c
checking whether build environment is sane... yes
(途中、省略)
config.status: executing depfiles commands
config.status: executing libtool commands
[root@linux]#
|
コンパイルを行なう。
| コンパイルを行なう |
|---|
[root@linux]# make
make all-recursive
make[1]: ディレクトリ `/usr/local/src/codec/opencore-amr-0.1.2' に入ります
Making all in amrnb
(途中、省略)
make[2]: ディレクトリ `/usr/local/src/codec/opencore-amr-0.1.2' から出ます
make[1]: ディレクトリ `/usr/local/src/codec/opencore-amr-0.1.2' から出ます
[root@linux]#
|
そしてインストールを行なうのだ。
| インストール作業 |
|---|
[root@linux]# make install
Making install in amrnb
make[1]: ディレクトリ `/usr/local/src/codec/opencore-amr-0.1.2/amrnb' に入ります
(途中、省略)
make[2]: ディレクトリ `/usr/local/src/codec/opencore-amr-0.1.2' から出ます
make[1]: ディレクトリ `/usr/local/src/codec/opencore-amr-0.1.2' から出ます
[root@linux]#
|
vo-amrwbencのインストール
次に、音声コーデックのインストールを行なう。
ここからダウンロードする。vo-amrwbenc
このコーデックは、参考にしたWebサイトには載っていなかったのだが
opencore-amrをダウンロードする際、このコーデックも拾ったので
そのままインストールする事にした。
| 展開作業 |
|---|
[root@linux]# tar xvfz vo-amrwbenc-0.1.1.tar.gz
vo-amrwbenc-0.1.1/
vo-amrwbenc-0.1.1/amrwbenc/
(途中、省略)
vo-amrwbenc-0.1.1/NOTICE
[root@linux]# cd vo-amrwbenc-0.1.1
[root@linux]#
|
そしてconfigureを行なう。
| configureを行なう |
|---|
[root@linux]# ./configure
checking for a BSD-compatible install... /usr/bin/install -c
(途中、省略)
config.status: executing libtool commands
[root@linus]#
|
そしてコンパイルを行なう。
| コンパイル |
|---|
[root@linux]# make
make all-am
make[1]: ディレクトリ `/usr/local/src/codec/vo-amrwbenc-0.1.1' に入ります
CC wrapper.lo
CC cmnMemory.lo
(途中、省略)
CCLD libvo-amrwbenc.la
make[1]: ディレクトリ `/usr/local/src/codec/vo-amrwbenc-0.1.1' から出ます
[root@linux]#
|
そしてインストールだ。
| インストール |
|---|
[root@ffmpeg vo-amrwbenc-0.1.1]# make install
make[1]: ディレクトリ `/usr/local/src/codec/vo-amrwbenc-0.1.1' に入ります
test -z "/usr/local/lib" || /bin/mkdir -p "/usr/local/lib"
(途中、省略)
/usr/bin/install -c -m 644 vo-amrwbenc.pc '/usr/local/lib/pkgconfig'
make[1]: ディレクトリ `/usr/local/src/codec/vo-amrwbenc-0.1.1' から出ます
[root@ffmpeg vo-amrwbenc-0.1.1]#
|
GSMのインストール
次にGSMのインストールを行なう。
ここからダウンロードする。GSM 06.10 lossy speech compression
まずは展開から。
| 展開 |
|---|
[root@linux]# tar xvfz gsm-1.0.13.tar.gz
gsm-1.0-pl13/
gsm-1.0-pl13/man/
(途中、省略)
gsm-1.0-pl13/Makefile
[root@linux]# cd gsm-1.0-pl13/
[root@linux]#
|
このソフトの厄介なのは・・・
自分でMakefikeを編集する必要があるのらー!
といってもコンパイルのオプションなどを書くような
難しい話ではなく、単に実行ファイルやライブラリなどの
保管場所の指定の記述を行なうだけなのだ。
Makefileの中身の書き換える所は4ヶ所だ。
| Makefileの書き換え(1) |
|---|
| 書き換え前 |
INSTALL_ROOT =
|
| 書き換え後 |
INSTALL_ROOT = /usr/local
|
2ヶ所目はここだ。
| Makefileの書き換え(2) |
|---|
| 書き換え前 |
GSM_INSTALL_INC = $(GSM_INSTALL_ROOT)/inc
|
| 書き換え後 |
GSM_INSTALL_INC = $(GSM_INSTALL_ROOT)/include/gsm
|
3ヶ所目はここだ。
| Makefileの書き換え(3) |
|---|
| 書き換え前 |
GSM_INSTALL_MAN = $(GSM_INSTALL_ROOT)/man/man3
|
| 書き換え後 |
GSM_INSTALL_MAN = /usr/share/man/man3
|
最後の4ヶ所目はここだ。
| Makefileの書き換え(4) |
|---|
| 書き換え前 |
TOAST_INSTALL_MAN = $(TOAST_INSTALL_ROOT)/man/man1
|
| 書き換え後 |
TOAST_INSTALL_MAN = /usr/share/man/man1
|
Makefileを書き変えたので、コンパイルを行なう。
| コンパイルを行なう |
|---|
[root@linux]# make
gcc -ansi -pedantic -c -O2 -DNeedFunctionPrototypes=1 -DSASR -DWAV49 -I./inc src/add.c
gcc -ansi -pedantic -c -O2 -DNeedFunctionPrototypes=1 -DSASR -DWAV49 -I./inc src/code.c
src/code.c: In function ‘Gsm_Coder’:
(途中、省略)
gcc -ansi -pedantic -o ./bin/toast ./src/toast.o ./src/toast_lin.o ./src/toast_ulaw.o ./src/toast_alaw.o ./src/toast_audio.o ./lib/libgsm.a
rm ./bin/tcat
rm: cannot remove `./bin/tcat': そのようなファイルやディレクトリはありません
make: [bin/tcat] エラー 1 (無視されました)
ln ./bin/toast ./bin/tcat
rm ./bin/untoast
rm: cannot remove `./bin/untoast': そのようなファイルやディレクトリはありません
make: [bin/untoast] エラー 1 (無視されました)
ln ./bin/toast ./bin/untoast
.: Done.
[root@linux]#
|
コンパイルの最後でエラーが発生した。(赤い部分)
該当のファイルがないため、消去できないというのだ。
でも、無視して良いエラーなのだ (^^)
|
そしてインストールを行なう。
| インストール |
|---|
[root@linux]# make install
if [ x"/usr/local" != x ]; then \
make /usr/local/bin/toast /usr/local/bin/tcat /usr/local/bin/untoast /usr/share/man/man1/toast.1; \
fi
make[1]: ディレクトリ `/usr/local/src/codec/gsm-1.0-pl13' に入ります
rm /usr/local/bin/toast
(途中、省略)
make[1]: ディレクトリ `/usr/local/src/codec/gsm-1.0-pl13' から出ます
install: Done.
[root@linux]#
|
LAMEのインストール
次にLAMEのインストールなのだ。
ここからダウンロードする。The LAME Project
| 展開の様子 |
|---|
[root@linux]# tar xvfz lame-3.98.4.tar.gz
lame-3.98.4/
lame-3.98.4/frontend/
lame-3.98.4/frontend/amiga_mpega.c
(途中、省略)
lame-3.98.4/include/lame.def
lame-3.98.4/HACKING
[root@linux]#
[root@linux]# cd lame-3.98.4
[root@linux]#
|
configureを行なう。
| configureを行なう |
|---|
[root@linux]# ./configure
checking build system type... i686-pc-linux-gnu
checking host system type... i686-pc-linux-gnu
(途中、省略)
config.status: creating config.h
config.status: executing depfiles commands
[root@linux]#
|
そしてコンパイルを行なう。
| コンパイルを行なう |
|---|
[root@linux]# make
make all-recursive
make[1]: ディレクトリ `/usr/local/src/codec/lame-3.98.4' に入ります
Making all in mpglib
make[2]: ディレクトリ `/usr/local/src/codec/lame-3.98.4/mpglib' に入ります
(途中、省略)
make[2]: ディレクトリ `/usr/local/src/codec/lame-3.98.4' から出ます
make[1]: ディレクトリ `/usr/local/src/codec/lame-3.98.4' から出ます
[root@linux]#
|
そしてインストールを行なう。
| インストールを行なう |
|---|
[root@linux]# make install
Making install in mpglib
make[1]: ディレクトリ `/usr/local/src/codec/lame-3.98.4/mpglib' に入ります
(途中、省略)
make[1]: ディレクトリ `/usr/local/src/codec/lame-3.98.4' から出ます
[root@linux]#
|
lcms2のインストール
openjpegのインストールの前に、lcms2のインストールを行なう。
どうやら、お薦めらしいのだが、lcms2とは・・・
わからへん (^^;;
だったので調べてみる事にした。
すると・・・
Little CMS2の略
だという。
CMSといえば、wordpressやxoopsなどを連想しそうなのだが
ここでのCMSとは・・・
Color Management System
なのだ。
カタカナ用語にすると「カラーマネジメントシステム」だ。
初めて知った用語だ。色の管理のようだ。
なので調べてみる事にしたのだが、あまりにも量が多いので
別の機会に紹介したいと思います (^^;;
ところで、lcms2のインストールだが、以下の所から
ダウンロードする。Little cms color engine
そして展開する。
| 展開 |
|---|
[root@linux]# tar xvfz lcms2-2.2.tar.gz
lcms2-2.2/
lcms2-2.2/autogen.sh
lcms2-2.2/src/
lcms2-2.2/src/cmssamp.c
(途中、省略)
lcms2-2.2/Lib/MS/MS.TXT
lcms2-2.2/Makefile.am
[root@linux]#
[root@linux]# cd lcms2-2.2
[root@linux]#
|
そしてconfigureを行なう。
| configureを行なう |
|---|
[root@linux]# ./configure
checking build system type... i686-pc-linux-gnu
checking host system type... i686-pc-linux-gnu
checking for a BSD-compatible install... /usr/bin/install -c
(途中、省略)
config.status: executing depfiles commands
config.status: executing libtool commands
[root@linux]#
|
そしてコンパイルを行なう。
| コンパイル |
|---|
[root@linux]# make
Making all in src
make[1]: ディレクトリ `/usr/local/src/codec/lcms2-2.2/src' に入ります
/bin/sh ../libtool --tag=CC --mode=compile gcc -std=gnu99
(途中、省略)
make[1]: `all-am' に対して行うべき事はありません.
make[1]: ディレクトリ `/usr/local/src/codec/lcms2-2.2' から出ます
[root@linux]#
|
そしてインストールだ。
| インストール |
|---|
[root@linux]# make install
Making install in src
make[1]: ディレクトリ `/usr/local/src/codec/lcms2-2.2/src' に入ります
make[2]: ディレクトリ `/usr/local/src/codec/lcms2-2.2/src' に入ります
(途中、省略)
make[2]: ディレクトリ `/usr/local/src/codec/lcms2-2.2' から出ます
make[1]: ディレクトリ `/usr/local/src/codec/lcms2-2.2' から出ます
[root@linux]#
|
これでインストール完了だ。
openjpegのインストール
lcms2が無事インストールできた所で、openjpegのインストールだ。
ここからダウンロードする。OpenJPEG homepage
| 展開 |
|---|
[root@ffmpeg codec]# tar xvfz openjpeg_v1_4_sources_r697.tgz
openjpeg_v1_4_sources_r697/
openjpeg_v1_4_sources_r697/aclocal.m4
(途中、省略)
openjpeg_v1_4_sources_r697/CMake/CTestCustom.cmake.in
openjpeg_v1_4_sources_r697/CMake/OpenJPEGConfig.cmake.in
[root@linux]#
[root@linux]# cd openjpeg_v1_4_sources_r697
[root@linux]#
|
そしてconfigureを行なう。
| configureを行なう |
|---|
[root@linux]# ./configure --enable-lcms2
checking build system type... i686-pc-linux-gnu
checking host system type... i686-pc-linux-gnu
(途中、省略)
config.status: creating jp3d/codec/Makefile
config.status: creating opj_config.h
config.status: executing depfiles commands
config.status: executing libtool commands
----------------------------------------------
your configuration
--with-png-libraries: yes
libpng header : yes
--enable-tiff : yes
libtiff header : yes
--enable-lcms2 : yes
lcms2 header : yes
lcms2 version :
--enable-lcms1 : no
lcms1 header : no
lcms1 version :
--enable-jpwl : no
--enable-jp3d : no
--enable-shared : yes
----------------------------------------------
[root@linux]#
|
|
lcms2を取り込みためオプションをつけた。
|
そしてコンパイルだ。
| コンパイル |
|---|
[root@linux]# make
make all-recursive
make[1]: ディレクトリ `/usr/local/src/codec/openjpeg_v1_4_sources_r697' に入ります
Making all in libopenjpeg
(途中、省略)
make[2]: ディレクトリ `/usr/local/src/codec/openjpeg_v1_4_sources_r697' から出ます
make[1]: ディレクトリ `/usr/local/src/codec/openjpeg_v1_4_sources_r697' から出ます
[root@linux]#
|
最後にインストールだ。
| インストール |
|---|
[root@linux]# make install
Making install in libopenjpeg
make[1]: ディレクトリ `/usr/local/src/codec/openjpeg_v1_4_sources_r697/libopenjpeg' に入ります
make[2]: ディレクトリ `/usr/local/src/codec/openjpeg_v1_4_sources_r697/libopenjpeg' に入ります
(途中、省略)
make[2]: ディレクトリ `/usr/local/src/codec/openjpeg_v1_4_sources_r697' から出ます
make[1]: ディレクトリ `/usr/local/src/codec/openjpeg_v1_4_sources_r697' から出ます
[root@linux]#
|
これでインストールの完了だ。
Theoraのインストール
ここからダウンロードする。theora.org
| 展開 |
|---|
[root@linux]# bzip2 -d libtheora-1.1.1.tar.bz2
[root@linux]# tar xvf libtheora-1.1.1.tar
libtheora-1.1.1/
libtheora-1.1.1/config.sub
(途中、省略)
libtheora-1.1.1/theoradec.pc.in
libtheora-1.1.1/theoradec-uninstalled.pc.in
[root@linux]#
[root@linux]# cd libtheora-1.1.1
[root@linux]#
|
configureを行なう。
| configureを行なう |
|---|
[root@linux]# ./configure
checking build system type... i686-pc-linux-gnu
checking host system type... i686-pc-linux-gnu
checking target system type... i686-pc-linux-gnu
(途中、省略)
Type 'make' to compile libtheora.
Type 'make install' to install libtheora.
Type 'make check' to run test suite (Valgrind testing not enabled)
Example programs will be built but not installed.
------------------------------------------------------------------------
[root@linux]#
|
コンパイルを行なう。
| コンパイル |
|---|
[root@linux]# make
make all-recursive
make[1]: ディレクトリ `/usr/local/src/codec/libtheora-1.1.1' に入ります
Making all in lib
make[2]: ディレクトリ `/usr/local/src/codec/libtheora-1.1.1/lib' に入ります
(途中、省略)
make[2]: ディレクトリ `/usr/local/src/codec/libtheora-1.1.1' から出ます
make[1]: ディレクトリ `/usr/local/src/codec/libtheora-1.1.1' から出ます
[root@linux]#
|
そしてインストールを行なう。
| インストール |
|---|
[root@linux]# make install
Making install in lib
make[1]: ディレクトリ `/usr/local/src/codec/libtheora-1.1.1/lib' に入ります
make[2]: ディレクトリ `/usr/local/src/codec/libtheora-1.1.1/lib' に入ります
(途中、省略)
make[2]: ディレクトリ `/usr/local/src/codec/libtheora-1.1.1' から出ます
make[1]: ディレクトリ `/usr/local/src/codec/libtheora-1.1.1' から出ます
[root@linux]#
|
だが、ここで終わらない。
きちんと動作するかどうかの点検機能があるので点検を行なう。
| 動作点検 |
|---|
[root@linux]# make check
Making check in lib
make[1]: ディレクトリ `/usr/local/src/codec/libtheora-1.1.1/lib' に入ります
make[1]: `check' に対して行うべき事はありません.
(途中、省略)
make[1]: `check-am' に対して行うべき事はありません.
make[1]: ディレクトリ `/usr/local/src/codec/libtheora-1.1.1' から出ます
[root@linux]#
|
|
無事、点検が終わったのだ (^^)
|
x264のインストール
ここからダウンロードする。VideoLAN x264
| 展開 |
|---|
[root@linux]# bzip2 -d last_x264.tar.bz2
[root@linux]# tar xvf last_x264.tar
x264-snapshot-20110628-2245/
x264-snapshot-20110628-2245/x264dll.c
(途中、省略)
x264-snapshot-20110628-2245/AUTHORS
x264-snapshot-20110628-2245/.gitignore
[root@linux]#
[root@linux]# cd x264-snapshot-20110628-2245/
[root@linux]#
|
configureを行なう。
| configure |
|---|
[root@linuc]# ./configure --enable-static --enable-static --enable-shared
./version.sh: line 2: git: command not found
Platform: X86
System: LINUX
cli: yes
(途中、省略)
You can run 'make' or 'make fprofiled' now.
[root@linux]#
|
そしてコンパイルだ。
| コンパイル |
|---|
[root@linux]# make
gcc -Wshadow -O3 -ffast-math -Wall -I. -march=i686 -mfpmath=sse -msse -std=gnu99 -fomit-frame-pointer -fno-tree-vectorize -c -o x264.o x264.c
(途中、省略)
gcc -o x264 x264.o input/input.o input/timecode.o input/raw.o input/y4m.o output/raw.o output/matroska.o output/matroska_ebml.o output/flv.o output/flv_bytestream.o filters/filters.o filters/video/video.o filters/video/source.o filters/video/internal.o filters/video/resize.o filters/video/cache.o filters/video/fix_vfr_pts.o filters/video/select_every.o filters/video/crop.o filters/video/depth.o input/thread.o libx264.a -lm -lpthread
[root@linux]#
|
最後にインストールだ。
| インストール |
|---|
[root@linux]# make install
install -d /usr/local/bin
install x264 /usr/local/bin
(途中、省略)
install -m 644 libx264.a /usr/local/lib
ranlib /usr/local/lib/libx264.a
[root@linux]#
|
xvidのインストール
ここからダウンロードする。Xvid.org
| 展開 |
|---|
[root@linux]# tar xvfz xvidcore-1.3.2.tar.gz
xvidcore/
xvidcore/ChangeLog
(途中、省略)
xvidcore/vfw/vfw.dsp
xvidcore/AUTHORS
[root@linux]# cd xvidcore
[root@linux]#
|
ここでconfigureといきたい所だが、configureファイルがない。
そこでINSTALL方法が書いたファイルがないかと探してみると
「vidcore/doc/INSTALL」にあった。
| vidcore/doc/INSTALLを読む(一部抜粋) |
|---|
The next step allows you to configure the xvid sources.
# cd ${xvidcore}/build/generic
# ./configure
|
指定のディレクトリ(赤い部分)に移動した上で
configureを行なう必要があるという。
|
そして指定のディレクトリに移動する。
| 指定のディレクトリに移動 |
|---|
[root@ffmpeg generic]# pwd
/usr/local/src/codec/xvidcore/build/generic
[root@ffmpeg generic]# ls
Makefile config.sub install-sh missing
bootstrap.sh configure libxvidcore.def platform.inc.in
config.guess configure.in libxvidcore.ld sources.inc
[root@ffmpeg generic]#
|
|
赤い部分がconfigureファイルだ。
|
configureを行なう。
| configureを行なう |
|---|
[root@ffmpeg generic]# ./configure
checking build system type... i686-pc-linux-gnu
checking host system type... i686-pc-linux-gnu
(途中、省略)
configure: creating ./config.status
config.status: creating platform.inc
[root@ffmpeg generic]#
|
そしてコンパイルだ。
| コンパイル |
|---|
[root@linux]# make
---------------------------------------------------------------
Object files used for this build
---------------------------------------------------------------
(途中、省略)
---------------------------------------------------------------
Xvid has been successfully built.
* Binaries are currently located in the '=build' directory
* To install them on your system, you can run '# make install'
as root.
---------------------------------------------------------------
[root@linux]#
|
最後にインストールだ。
| インストール |
|---|
[root@linux]# make install
D: /usr/local/lib
I: /usr/local/lib/libxvidcore.so.4.3
I: /usr/local/lib/libxvidcore.a
D: /usr/local/include
I: /usr/local/include/xvid.h
[root@linux]#
|
WebMのインストール
ここからダウンロードする。webm
| 展開 |
|---|
[root@linux]# bzip2 -d libvpx-v0.9.6.tar.bz2
[root@linux]# tar xvf libvpx-v0.9.6.tar
libvpx-v0.9.6/
libvpx-v0.9.6/.gitattributes
(途中、省略)
libvpx-v0.9.6/y4minput.c
libvpx-v0.9.6/y4minput.h
[root@linux]#
[root@linux]# cd libvpx-v0.9.6
[root@linux]#
|
そしてconfigureだ。
| configure |
|---|
[root@ffmpeg libvpx-v0.9.6]# ./configure --enable-shared
Configuring selected codecs
enabling vp8_encoder
enabling vp8_decoder
Configuring for target 'x86-linux-gcc'
enabling x86
enabling pic
enabling runtime_cpu_detect
enabling mmx
enabling sse
enabling sse2
enabling sse3
enabling ssse3
enabling sse4_1
using yasm
enabling postproc
Creating makefiles for x86-linux-gcc libs
Creating makefiles for x86-linux-gcc examples
Creating makefiles for x86-linux-gcc docs
[root@ffmpeg libvpx-v0.9.6]#
|
コンパイルを行なう。
| コンパイル |
|---|
[root@linux]# make
[DEP] vpx_ports/x86_abi_support.asm.d
[DEP] vpx_ports/emms.asm.d
(途中、省略)
[CC] vp8cx_set_ref.c.o
[LD] vp8cx_set_ref
make[1]: `all-docs' に対して行うべき事はありません.
[root@linux]#
|
そしてインストールだ。
| インストール |
|---|
[root@linux]# make install
[INSTALL] /usr/local/include/vpx/vp8.h
[INSTALL] /usr/local/include/vpx/vp8e.h
(途中、省略)
[INSTALL] /usr/local/bin/vpxdec
[INSTALL] /usr/local/bin/vpxenc
make[1]: `install' に対して行うべき事はありません.
[root@linux]#
|
これでコーデックのインストールは終了した。
それにしても長い作業だった。
flvtool2のインストール
flvtool2をインストールしないとPHPmotionを動かしている際
動画の絵の1枚目が表示されない形になってしまう。
ところで・・・
flvtool2って何やねん?
なのだ。
そこで調べてみた。
| flvtool2とは |
|---|
フラッシュ形式のFLVファイルにメタデータを挿入したり
メタデータを表示させるためのプログラム
|
でも、これだけだと・・・
メタデータって何やねん?
なのだ。
そこで、FLVについてのメタデータとは何かを調べてみる事にした。
| FLVのメタデータとは |
|---|
動画の大きさ、コーデックの種類といった動画の関する
情報の事をメタデータというのだ。
|
さて、flvtool2のインストールを行なう事にした。
ここからダウンロードした。RubyForge:flvtool2
そして展開をする。
| 展開 |
|---|
[root@linux]# tar xvfz flvtool2-1.0.6.tgz
flvtool2-1.0.6/
flvtool2-1.0.6/bin/
flvtool2-1.0.6/bin/._flvtool2
(途中、省略)
flvtool2-1.0.6/._setup.rb
flvtool2-1.0.6/setup.rb
[root@linux]#
[root@linux]# cd flvtool2-1.0.6
[root@linux]#
|
ここからが、他のソフトと違う。
configureもmakeでコンパイルも行なわないのだ。
Rubyでインストールプログラムが走らせるのだ。
まずはインストールのための準備だ。
| インストールのための準備(1) |
|---|
[root@linux]# ruby setup.rb config
---> bin
<--- bin
---> lib
---> lib/flv
<--- lib/flv
---> lib/flvtool2
<--- lib/flvtool2
<--- lib
[root@linux]#
|
configなので、インストールするOSの環境などを検出と
それに合ったようにする作業だと思う。
|
そしてインストールのための準備を行なう。
| インストールの準備(2) |
|---|
[root@linux]# ruby setup.rb setup
---> bin
updating shebang: flvtool2
<--- bin
---> lib
---> lib/flv
<--- lib/flv
---> lib/flvtool2
<--- lib/flvtool2
<--- lib
[root@linux]#
|
|
こちらがインストールのための本格準備のようだ。
|
そしてインストールを行なう。
| flvtool2のインストール |
|---|
[root@linux]# ruby setup.rb install
rm -f InstalledFiles
---> bin
mkdir -p /usr/bin
install flvtool2 /usr/bin/
<--- bin
---> lib
mkdir -p /usr/lib/ruby/site_ruby/1.8
install mixml.rb /usr/lib/ruby/site_ruby/1.8/
install flvtool2.rb /usr/lib/ruby/site_ruby/1.8/
install miyaml.rb /usr/lib/ruby/site_ruby/1.8/
install flv.rb /usr/lib/ruby/site_ruby/1.8/
---> lib/flv
mkdir -p /usr/lib/ruby/site_ruby/1.8/flv
install amf_string_buffer.rb /usr/lib/ruby/site_ruby/1.8/flv
install stream.rb /usr/lib/ruby/site_ruby/1.8/flv
install video_tag.rb /usr/lib/ruby/site_ruby/1.8/flv
install core_extensions.rb /usr/lib/ruby/site_ruby/1.8/flv
install tag.rb /usr/lib/ruby/site_ruby/1.8/flv
install audio_tag.rb /usr/lib/ruby/site_ruby/1.8/flv
install meta_tag.rb /usr/lib/ruby/site_ruby/1.8/flv
<--- lib/flv
---> lib/flvtool2
mkdir -p /usr/lib/ruby/site_ruby/1.8/flvtool2
install base.rb /usr/lib/ruby/site_ruby/1.8/flvtool2
install version.rb /usr/lib/ruby/site_ruby/1.8/flvtool2
<--- lib/flvtool2
<--- lib
[root@linux]#
|
これでflvtool2のインストールが完了した。
ffmpegのインストール
コーデックのインストールの後は、PHPmotionに
アップロードした動画をフレッシュ形式に変換するための
ffmpegのインストールを行なう。
ffmpegはここからダウンロードするのだ。
FFmpeg
お試しでインストールした時はffmpeg-0.7.1を使ったが
ここでは最新版の0.7.9を使う事にした。
| ffmpeg-0.8系について |
|---|
0.7系より上の0.8系も存在する。
だが、この後でインストールするffmpeg-php-0.6系と
ffmpeg-0.8系の相性が悪いため、ffmpeg-0.6のインストールの際
エラーが発生しています。そのため、ここではffmpeg-0.7系を
使う事にしています。
|
早速、展開を行なう。
| ffmpegの展開 |
|---|
[root@linux]# tar xvfz ffmpeg-0.7.9.tar.gz
ffmpeg-0.7.9/
ffmpeg-0.7.9/CREDITS
ffmpeg-0.7.9/libswscale/
ffmpeg-0.7.9/libswscale/rgb2rgb.c
ffmpeg-0.7.9/libswscale/yuv2rgb.c
(途中、省略)
ffmpeg-0.7.9/libavformat/sox.h
ffmpeg-0.7.9/libavformat/lmlm4.c
ffmpeg-0.7.9/libavformat/dnxhddec.c
ffmpeg-0.7.9/version.sh
ffmpeg-0.7.9/configure
[root@linux]# cd ffmpeg-0.7.9
[root@linux]#
|
そしてconfigureを行なう。
| configureを行なう |
|---|
[root@linux]# ./configure --enable-shared --enable-nonfree
--enable-gpl --enable-version3 --disable-ffplay
--disable-ffserver --enable-libfreetype
--enable-libfaac --enable-libgsm
--enable-libmp3lame --enable-libopenjpeg
--enable-libopencore-amrwb
--enable-libopencore-amrnb --enable-libtheora
--enable-libvo-amrwbenc --enable-libx264
--enable-libxvid --enable-libvpx
|
configureのオプションは、各種コーデックを取り込むためだ。
これもWebサイトの丸写しなのだ (^^)
ちなみに、見やすくするため改行をいれていますが
実際にconfigureする時は改行しないでください。
|
そしてコンパイルを行なう。
| makeでコンパイル |
|---|
[root@linux]# make
CC libavdevice/alldevices.o
In file included from libavdevice/avdevice.h:23,
from libavdevice/alldevices.c:22:
./libavformat/avformat.h:158: 警告: ‘AVMetadata’ is deprecated
CC libavdevice/alsa-audio-common.o
In file included from libavdevice/avdevice.h:23,
(途中、省略)
cmdutils.c:354: 警告: ‘av_find_opt’ is deprecated (declared at libavutil/opt.h:111)
cmdutils.c:361: 警告: ‘av_find_opt’ is deprecated (declared at libavutil/opt.h:111)
cmdutils.c: In function ‘set_context_opts’:
cmdutils.c:494: 警告: ‘av_find_opt’ is deprecated (declared at libavutil/opt.h:111)
LD ffmpeg_g
CP ffmpeg
STRIP ffmpeg
CC ffprobe.o
In file included from ffprobe.c:24:
libavformat/avformat.h:158: 警告: ‘AVMetadata’ is deprecated
LD ffprobe_g
CP ffprobe
STRIP ffprobe
[root@linux]#
|
結構、警告が出るのだが気にしないのだ (^^)
そしてffmpegのインストールを行なう。
| インストール |
|---|
[root@linux]# make install
INSTALL libavdevice/libavdevice.a
INSTALL libavdevice/libavdevice.so
(途中、省略)
INSTALL libavutil/avconfig.h
INSTALL libavutil/libavutil.pc
[root@linux]#
|
これでインストールが完了した。
だが、このままでffmpegを動かすと次のエラーが出る事がある。
| こんなエラーを吐く事がある |
|---|
[root@linux]# ffmpeg
ffmpeg: error while loading shared libraries: libavdevice.so.52:
cannot open shared object file: No such file or directory
[root@linux]#
|
コーデックの共有ライブラリが指定のディレクトリには
存在しないという意味なのだ。
コーデックの共有ライブラリは存在する。
| コーデックの共有ライブラリのあるディレクトリ |
|---|
[root@linux]# pwd
/usr/local/lib
[root@linux]# ls
libavcodec.a liblcms2.so libtheora.la
libavcodec.so liblcms2.so.2 libtheora.so
libavcodec.so.53 liblcms2.so.2.0.2 libtheora.so.0
libavcodec.so.53.7.0 libmp3lame.a libtheora.so.0.3.10
libavdevice.a libmp3lame.la libtheoradec.a
libavdevice.so libmp3lame.so libtheoradec.la
libavdevice.so.53 libmp3lame.so.0 libtheoradec.so
libavdevice.so.53.1.1 libmp3lame.so.0.0.0 libtheoradec.so.1
libavfilter.a libmp4ff.a libtheoradec.so.1.1.4
libavfilter.so libopencore-amrnb.a libtheoraenc.a
libavfilter.so.2 libopencore-amrnb.la libtheoraenc.la
libavfilter.so.2.23.0 libopencore-amrnb.so libtheoraenc.so
libavformat.a libopencore-amrnb.so.0 libtheoraenc.so.1
libavformat.so libopencore-amrnb.so.0.0.2 libtheoraenc.so.1.1.2
libavformat.so.53 libopencore-amrwb.a libvo-amrwbenc.a
libavformat.so.53.4.0 libopencore-amrwb.la libvo-amrwbenc.la
libavutil.a libopencore-amrwb.so libvo-amrwbenc.so
libavutil.so libopencore-amrwb.so.0 libvo-amrwbenc.so.0
libavutil.so.51 libopencore-amrwb.so.0.0.2 libvo-amrwbenc.so.0.0.2
libavutil.so.51.9.1 libopenjpeg.a libvpx.a
libfaac.a libopenjpeg.la libvpx.so
libfaac.la libopenjpeg.so libvpx.so.0
libfaac.so libopenjpeg.so.1 libvpx.so.0.9
libfaac.so.0 libopenjpeg.so.1.4.0 libvpx.so.0.9.6
libfaac.so.0.0.0 libpostproc.a libx264.a
libfaad.a libpostproc.so libx264.so
libfaad.la libpostproc.so.51 libx264.so.115
libfaad.so libpostproc.so.51.2.0 libxvidcore.a
libfaad.so.2 libswscale.a libxvidcore.so.4
libfaad.so.2.0.0 libswscale.so libxvidcore.so.4.3
libgsm.a libswscale.so.2 libyasm.a
liblcms2.a libswscale.so.2.0.0 pkgconfig
liblcms2.la libtheora.a
[root@linux]#
|
|
/usr/local/libのディレクトリには存在するのだ。
|
でも、今回は慌てなかった。
ライブラリのディレクトリを認識させるコマンドがある。
ldconfigコマンドなのらー!!
もちろん、/usr/local/libにあるライブラリを読み込むための
設定をしているのが前提だ。yasmのインストールの所で書いています。
これで良いのだ (^^)
MPlayerのインストール
MPlayerをインストールするのだが・・・
MPlayerって何やねん?
なので、MPlayerのサイトを見てみる事にした。
MPlayer The Movie Player英語だ。でも、読めねばならぬ・・・!!
多くの動画を再生したり、各形式に保存できたりするソフトのようだ。
ffmpegみたいな物だが、PHPmotionでは、両方、使うというのだ。
早速、以下のサイトからダウンロードする。
MPlayer(ソフト)とコーデック
まずはコーデックから展開とインストールを行なう。
| コーデックを展開し、インストールする |
|---|
[root@linux]# bzip2 -d all-20110131.tar.bz2
[root@linux]# tar xvf all-20110131.tar
all-20110131/
all-20110131/GeoCodec.dll
all-20110131/zmbv.dll
all-20110131/kdvyuv8.dll
(途中、省略)
all-20110131/Amv2Codec.dll
all-20110131/AvidAVdnCodec.qtx
all-20110131/README
[root@linux]#
[root@linux]# cd all-20110131
[root@linux]# cp * /usr/local/lib/codec/
[root@linux]#
|
青い部分がインストールの部分。
ライブラリにコーデックを入れるだけなのだ。
|
次に、MPlayerのインストールを行なう。
| MPlayerの展開 |
|---|
[root@linux]# tar xvfz MPlayer-1.0rc4.tar.gz
MPlayer-1.0rc4/
MPlayer-1.0rc4/libdvdnav/
MPlayer-1.0rc4/libdvdnav/remap.h
MPlayer-1.0rc4/libdvdnav/README.MAP
(途中、省略)
MPlayer-1.0rc4/libmpcodecs/vf_rectangle.c
MPlayer-1.0rc4/libmpcodecs/ae_faac.c
MPlayer-1.0rc4/path.h
MPlayer-1.0rc4/vobsub.c
[root@linux]#
|
そしてconfigureを行なう。
| configureを行なう |
|---|
[root@linux]# ./configure
Checking for cc version ... 4.1.2
Detected operating system: Linux
Detected host architecture: i386
(途中、省略)
NOTE: The --enable-* parameters unconditionally force options on, completely
skipping autodetection. This behavior is unlike what you may be used to from
autoconf-based configure scripts that can decide to override you. This greater
level of control comes at a price. You may have to provide the correct compiler
and linker flags yourself.
If you used one of these options (except --enable-menu and similar ones that
turn on internal features) and experience a compilation or linking failure,
make sure you have passed the necessary compiler/linker flags to configure.
If you suspect a bug, please read DOCS/HTML//bugreports.html.
[root@linux]#
|
そしてコンパイルを行なう。
| コンパイルを行なう |
|---|
[root@linux]# make
help/help_create.sh help/help_mp-en.h UTF-8
awk -f vidix/pci_db2c.awk vidix/pci.db 1
./version.sh `cc -dumpversion`
cc -O -DCODECS2HTML -I. -o codec-cfg codec-cfg.c
./codec-cfg etc/codecs.conf > codecs.conf.h
Reading etc/codecs.conf: 158 audio & 340 video codecs
(以下、省略)
[root@linux]#
|
そしてインストールだ。
| インストール |
|---|
[root@linux]# make install
install -d /usr/local/bin /usr/local/etc/mplayer /usr/local/lib
install -m 755 -s mencoder /usr/local/bin
install -d /usr/local/share/man/man1
install -m 644 DOCS/man/en/mplayer.1 /usr/local/share/man/man1/
cd /usr/local/share/man/man1 && ln -sf mplayer.1 mencoder.1
install -m 755 -s mplayer /usr/local/bin
[root@linux]#
|
これでMPlayerのインストールが終わった。
Apache2のインストール
Webサーバーのソフト、Apache2のインストールだ。
私は、RPMを極力使わないため、ソースコンパイルを行なう。
| Aapche2の展開 |
|---|
[root@linux]# tar xvfz httpd-2.2.19.tar.gz
httpd-2.2.19/
httpd-2.2.19/emacs-style
httpd-2.2.19/httpd.dsp
(途中、省略)
httpd-2.2.19/README
httpd-2.2.19/LAYOUT
httpd-2.2.19/buildconf
httpd-2.2.19/.gdbinit
[root@linux]# cd httpd-2.2.19
[root@linux]#
|
そしてconfigureを行なう。
| configureを行なう |
|---|
[root@linux]# ./configure --enable-rewrite
checking for chosen layout... Apache
checking for working mkdir -p... yes
checking build system type... i686-pc-linux-gnu
checking host system type... i686-pc-linux-gnu
(途中、省略)
config.status: creating build/config_vars.sh
config.status: creating include/ap_config_auto.h
config.status: executing default commands
[root@linux]#
|
|
赤い部分のオプションは必須です。
|
そしてmakeを行なう。コンパイルなのだ。
| Apache2のmakeを行なう |
|---|
[root@linux]# make
Making all in srclib
make[1]: ディレクトリ `/usr/local/src/httpd-2.2.19/srclib' に入ります
Making all in apr
make[2]: ディレクトリ `/usr/local/src/httpd-2.2.19/srclib/apr' に入ります
(途中、省略)
make[1]: ディレクトリ `/usr/local/src/httpd-2.2.19' から出ます
[root@linux]#
|
そしてApache2のインストールなのだ。
| Aapche2のインストール |
|---|
[root@linux]# make install
Making install in srclib
make[1]: ディレクトリ `/usr/local/src/httpd-2.2.19/srclib' に入ります
Making install in apr
(途中、省略)
mkdir /usr/local/apache2/manual
make[1]: ディレクトリ `/usr/local/src/httpd-2.2.19' から出ます
[root@linux]#
|
Apache2の設定は後で行なう。
MySQLのインストール
PHPmotionのデータベースとしてMySQLのインストールだ。
MySQL本体は、CentOSインストール時に、MySQLが
既にインストールされていたので省略。
(ソフトの選択方法によってはインストールされない場合もあります)
でも、PHPを動かす際、MySQLを呼び出す関数を使うのだが
MySQLが提供するヘッダーやライブラリを必要とするため
MySQL関係の開発ツールをインストールする必要がある。
もちろんCentOSを使っている私は、RPMを使うのだ (^^)
| MySQLのヘッダーやライブラリのインストール |
|---|
[root@linux]# rpm -ihv mysql-devel-5.0.77-4.el5_5.4.i386.rpm
警告: mysql-devel-5.0.77-4.el5_5.4.i386.rpm: ヘッダ V3 DSA signature: NOKEY, key ID e8562897
準備中... ########################################### [100%]
1:mysql-devel ########################################### [100%]
[root@linux]#
|
これでMySQLに接続するPHPの関数が使えるようになった。
MySQLの設定について後述しています。
PHPのインストール
次にPHPのインストールを行なう。
PHPを展開する。
| PHPの展開 |
|---|
[root@linux]# tar xvfz php-5.3.6.tar.gz
php-5.3.6/
php-5.3.6/ext/
php-5.3.6/ext/gd/
(途中、省略)
php-5.3.6/README.UNIX-BUILD-SYSTEM
php-5.3.6/buildconf.bat
[root@linux]# cd php-5.3.6
[root@linux]#
|
そしてconfigureを行なう。
| configureを行なう |
|---|
configure --with-apxs2=/usr/local/apache2/bin/apxs --disable-ipv6
--with-zlib --with-bz2 --with-gd --enable-mbstring
--with-mysql --enable-bcmath --with-curl
|
色々なライブラリを取り込むために多くのオプションをつける。
今回、IPv6を外しましたが、IPが枯渇してしまったため
将来は、IPv6を外さない方が賢明でしょう (^^)
(注意1)
見やすいように改行をいれていますが、実際は改行はしません。
|
configureが終わったら、次はコンパイルなのだ。
| コンパイルを行なう |
|---|
[root@linux]# make
/bin/sh /usr/local/src/php-5.3.6/libtool --silent --preserve-dup-deps
(途中、省略)
invertedregexiterator.inc
phar.inc
Build complete.
Don't forget to run 'make test'.
[root@linux]#
|
青い部分は「点検を忘れないで」の意味だ。
コンパイルしてできた物が正常に動くかどうかの点検なのだ。
|
そこで点検を行なう事にする。
| 正常に動くかどうかの点検 |
|---|
[root@linux]# make test
(途中、省略)
the test cases are doing. If you don't want to send it
immediately, you can choose "s" to save the report to
a file that you can send us later.
Do you want to send this report now? [Yns]: n
[root@linux]#
|
赤い部分で報告をしますかと問われますが
報告する必要もないと思ったので「いいえ」の「n」を選択した。
|
そしてインストールを行なう。
| インストール |
|---|
[root@linux]# make install
(途中、省略)
You may want to add: /usr/local/lib/php to your php.ini include_path
/usr/local/src/php-5.3.6/build/shtool install -c ext/phar/phar.phar /usr/local/bin
ln -s -f /usr/local/bin/phar.phar /usr/local/bin/phar
Installing PDO headers: /usr/local/include/php/ext/pdo/
[root@linux]#
|
これでPHPのインストールは完了だ。
設定については後述しています。
ffmpeg-phpのインストール
ffmpeg-phpは、ここからダウンロードする。
SourceForge ffmpeg-php extension
ところで・・・
ffmpeg-phpって何やねん?
なのだ。
| ffmpeg-php |
|---|
動画変換ソフトのffmpegの機能をPHP上から使えるようにした
PHPの外部ライブラリみたいな物だという。
PHPmotionはPHP言語で組まれている上、ffmpegを使うため
必然的にffmpegが必要になってくるのだ。
ちなみに以下のサイトの受け売りに肉付けしたのだ (^^)
ffmpeg-phpで動画のデータを取得しよう
|
ffmpegが何なのか、わかった(?)所でインストールの開始だ。
まずはソフトの展開から。
| ffmpeg-phpの展開 |
|---|
[root@linux]# bzip2 -d ffmpeg-php-0.6.0.tbz2
[root@linux]# tar xvf ffmpeg-php-0.6.0.tar
ffmpeg-php-0.6.0/
ffmpeg-php-0.6.0/tests/
(途中、省略)
ffmpeg-php-0.6.0/ffmpeg_tools.c
ffmpeg-php-0.6.0/ffmpeg_tools.h
[root@linux]#
[root@linux]# cd ffmpeg-php-0.6.0
[root@linux]#
|
そしてファイル一覧を眺めてみる。
| 展開後、ファイルの一覧を見る |
|---|
[root@linux]# ls
CREDITS LICENSE ffmpeg_errorhandler.c ffmpeg_movie.h gd_io.h
ChangeLog TODO ffmpeg_frame.c ffmpeg_tools.c php_ffmpeg.h
EXPERIMENTAL config.m4 ffmpeg_frame.h ffmpeg_tools.h test_ffmpeg.php
INSTALL ffmpeg-php.c ffmpeg_movie.c gd.h tests
[root@linux]#
|
configureを行なうのだが、このディレクトリには
configureファイルがないが慌てる必要はないのだ (^^)
インストール方法は「INSTALL」ファイルの記述されている。
| INSTALLの中身 (一部抜粋) |
|---|
BUILDING FFMPEG-PHP AS A SHARED EXTENSION
-----------------------------------------
1. Build php if not already built or installed by your distro (See the file INSTALL in your php source directory)
2. Unpack the archive
tar -xjf ffmpeg-php.X.x.x.tbz2 -C /path/to/php_sources/ext/
3. cd into the ffmpeg extension directory
cd /path/to/php_sources/ext/ffmpeg-php.X.X.X/
4. Run phpize (included with your php install) to build configuration files
phpize
5. Configure and build
./configure && make
6. Install the shared extension
make install (as root)
|
赤い部分にあるうに、まずはphpizeというプログラムを実行させる。
そして青い部分にあるように、configureとmakeを使う。
|
phpizeを実行してみる。
| phpizeコマンドを使ってみる |
|---|
[root@linux]# phpize
Configuring for:
PHP Api Version: 20090626
Zend Module Api No: 20090626
Zend Extension Api No: 220090626
[root@linux]#
|
するとconfigureファイルが生成された。
| configureファイルが生成された |
|---|
[root@linux]# ls
CREDITS acinclude.m4 config.sub ffmpeg_movie.c ltmain.sh
ChangeLog aclocal.m4 configure ffmpeg_movie.h missing
EXPERIMENTAL autom4te.cache configure.in ffmpeg_tools.c mkinstalldirs
INSTALL build ffmpeg-php.c ffmpeg_tools.h php_ffmpeg.h
LICENSE config.guess ffmpeg_errorhandler.c gd.h run-tests.php
Makefile.global config.h.in ffmpeg_frame.c gd_io.h test_ffmpeg.php
TODO config.m4 ffmpeg_frame.h install-sh tests
[root@linux]#
|
configureを実行する。
| configureを実行 |
|---|
[root@linux]# ./configure
checking for egrep... grep -E
checking for a sed that does not truncate output... /bin/sed
(途中、省略)
configure: creating ./config.status
config.status: creating config.h
[root@linux]#
|
コンパイルを行なう前に、ソースの一部の書き換えが必要なのだ。
なぜなら、このままコンパイルをしてもエラーを吐くからだ。
詳しくは、最初にffmpeg-phpをインストールした時に
どんなエラーが出るのか書いています。
| ソース書き換えの注意 |
|---|
ffmpeg-phpのバージョン0.6.0の場合は
ソースの書き換えが必要なのだが、他のバージョンでは
検証していません。そのため、むやみにソースを書き換えて
コンパイルができなくても、私は責任がとれないのらー!! (^^;;
|
さて、ソースの書き換え箇所だが、ffmepg_frame.cの
421行を書き換える。
| ffmpeg_fram.c 421行の書き換え |
|---|
| 書き換え前 |
/* create a an av_frame and allocate space for it */
frame = avcodec_alloc_frame();
avpicture_alloc((AVPicture*)frame, PIX_FMT_RGBA32, width, height);
|
| 書き換え後 |
/* create a an av_frame and allocate space for it */
frame = avcodec_alloc_frame();
avpicture_alloc((AVPicture*)frame, PIX_FMT_RGB32, width, height);
|
RGBA32とRGB32の書き換えなのだ。
| RGBA32とRGB32について |
|---|
実は2つとも同じ意味なのだ。
モニターでの色の表現の規格なのだ。
RはRed(赤)、GはGreen(緑)、BはBlue(青)で色の3原色だ。
32の意味だが、3色の明るさの度合いは256種類にしているため
256×256×256を表現するのに、24ビット必要だ。
それに透明度を1バイト(8ビット)で表現しているため
組み合わせとしては32ビット表現で、色を表現している。
Aは透明度なのだが、省略する事がある。
なのでRGB32とRGBA32は同じ意味なのだ。
色の話はカラーマネージメント(CMS)につながるのだが
詳細については、別の機会に取り上げたいと思います。
|
そしてコンパイルを行なう。
| コンパイルを行なう |
|---|
[root@linux]# make
/bin/sh /usr/local/src/ffmpeg-php-0.6.0/libtool --mode=compile cc -I. -I/usr/local/src/ffmpeg-php-0.6.0 -DPHP_ATOM_INC -I/usr/local/src/ffmpeg-php-0.6.0/include -I/usr/local/src/ffmpeg-php-0.6.0/main -I/usr/local/src/ffmpeg-php-0.6.0 -I/usr/local/include/php -I/usr/local/include/php/main -I/usr/local/include/php/TSRM -I/usr/local/include/php/Zend -I/usr/local/include/php/ext -I/usr/local/include/php/ext/date/lib -I/usr/local/include/libavcodec/ -I/usr/local/include/libavformat/ -I/usr/local/include/libavutil/ -I/usr/local/include/libswscale/ -I/usr/local/include/libavfilter/ -I/usr/local/include/libavdevice/ -DHAVE_CONFIG_H -g -O2 -Wall -fno-strict-aliasing -c /usr/local/src/ffmpeg-php-0.6.0/ffmpeg-php.c -o ffmpeg-php.lo
(途中、省略)
Build complete.
Don't forget to run 'make test'.
[root@linux]#
|
そして問題なく動くかどうかの検査を行なう。
| 検査を行なう |
|---|
[root@linux]# make test
Build complete.
Don't forget to run 'make test'.
(途中、省略)
a file that you can send us later.
Do you want to send this report now? [Yns]: n
[root@linux]#
|
検査の結果、問題なしのようだ。
検査結果の報告の送信は任意なので、ここでは行なわなかった。
|
そしてインストールを行なう。
| ffmpeg-phpのインストール |
|---|
[root@linux]# make install
Installing shared extensions: /usr/local/lib/php/extensions/no-debug-non-zts-20090626/
[root@linux]#
|
これでffmpeg-phpのインストールは完了した。
あとはPHPの設定ファイルで、モジュールを取り込むための
記述を行なえば良いのだ。
記述については後述しています。
MySQLの設定
ここでMySQLの設定を行なう。
まずはMySQLの起動だ。
| MySQLの起動 |
|---|
[root@linux]# /etc/rc.d/init.d/mysqld start
MySQL を起動中: [ OK ]
[root@linux]#
|
そしてMySQLの設定を行なう。
まずはMySQLのデータベース内で使われる文字列の
文字コードの設定だ。UTF-8にするのだ。
設定ファイル(my.cnf)を開いて記述の追加を行なう。
| my.cnfの記述の追加(2ヶ所) |
|---|
| 追加前 |
[mysqld]
datadir=/var/lib/mysql
socket=/var/lib/mysql/mysql.sock
user=mysql
# Default to using old password format for compatibility with mysql 3.x
# clients (those using the mysqlclient10 compatibility package).
old_passwords=1
# Disabling symbolic-links is recommended to prevent assorted security risks;
# to do so, uncomment this line:
# symbolic-links=0
[mysqld_safe]
log-error=/var/log/mysqld.log
pid-file=/var/run/mysqld/mysqld.pid
|
| 追加後 |
[mysqld]
datadir=/var/lib/mysql
socket=/var/lib/mysql/mysql.sock
user=mysql
# Default to using old password format for compatibility with mysql 3.x
# clients (those using the mysqlclient10 compatibility package).
old_passwords=1
# Disabling symbolic-links is recommended to prevent assorted security risks;
# to do so, uncomment this line:
# symbolic-links=0
default-character-set = utf8
[mysqld_safe]
log-error=/var/log/mysqld.log
pid-file=/var/run/mysqld/mysqld.pid
[mysql]
default-character-set = utf8
|
これでデータベース内の文字コードがUTF-8になったのだ。
次にMySQLの管理者のパスワードの設定を行なう。
| MySQLの管理者のパスワード設定 |
|---|
[root@linux]# mysql -u root
Welcome to the MySQL monitor. Commands end with ; or \g.
Your MySQL connection id is 4
Server version: 5.0.77 Source distribution
Type 'help;' or '\h' for help. Type '\c' to clear the buffer.
mysql> SET PASSWORD FOR 'root'@'localhost' = PASSWORD('mayumi');
Query OK, 0 rows affected (0.00 sec)
mysql> SET PASSWORD FOR 'root'@'127.0.0.1' = PASSWORD('mayumi');
Query OK, 0 rows affected (0.00 sec)
mysql>
|
青い部分の記述にあるように、管理者パスワードを設定する。
ピンクの部分だが、ローカル(自分自身)からの接続用のパスワードなのだ。
自分自身と他のマシンからの接続でパスワードを分ける事ができるのだ。
パスワードは、私の愛する小野真弓の「mayumi」なのだ (♥o♥)
|
そして管理者権限でデータベースの作成を行なう。
| 管理者権限でデータベースの作成 |
|---|
mysql> CREATE DATABASE moviedb CHARACTER SET UTF8 ;
Query OK, 1 row affected (0.02 sec)
mysql>
|
ここではデータベース名を「moviedb」にした。
文字コードはUTF-8にするのだ。
|
データベースの接続する場合だが、まさか管理者のrootで
接続するわけにはいかない。
そこで、ユーザー名を作成する。ついでにパスワードの設定も行なう。
| MySQLのユーザー作成とパスワード設定 |
|---|
mysql> CREATE USER mayumi@localhost ;
Query OK, 0 rows affected (0.00 sec)
mysql>
mysql> SET PASSWORD FOR 'mayumi'@'localhost' = PASSWORD('lover');
Query OK, 0 rows affected (0.00 sec)
mysql>
|
ユーザー名を「mayumi」にして、パスワードを「lover」にした。
デモ実験なので、こんなパスワードでも良いのだが
実際に運用の場合は、あまりお薦めしません (^^)
|
実際、登録した「mayumi」でMySQLに接続してみる。
| 「mayumi」でMySQLに接続してみる |
|---|
[root@linux]# mysql -u mayumi -p
Enter password:
Welcome to the MySQL monitor. Commands end with ; or \g.
Your MySQL connection id is 205
Server version: 5.0.77 Source distribution
Type 'help;' or '\h' for help. Type '\c' to clear the buffer.
mysql>
|
|
問題なく「mayumi」で接続する事ができた (^^)
|
これでMySQLの設定は終了だ。
PHPmotionのインストール
PHPmotionに必要なソフト類のインストールが終わったので
ようやくPHPmotionのインストールが行なえる。
ここからダウンロードする。
PHPmotion(英語のサイト)
まずはPHPmotionを展開する。
Apacheをインストールした時、ソースコンパイルな上
ディレクトリ指定は初期状態のままなのだ。
そこでPHPmotionを/usr/local/apache2 のディレクトリに置く。
そして展開を行なう。
| phpmotion.zipの展開 |
|---|
[root@linux]# pwd
/usr/local/apache2
[root@linux]# unzip phpmotion.zip
Archive: phpmotion.zip
inflating: phpmotion/.htaccess
inflating: phpmotion/403.php
inflating: phpmotion/404.php
(途中、省略)
inflating: phpmotion/videoplaylist_ajax.php
inflating: phpmotion/word-suggest.php
[root@linux]# chown -R nobody:nobody phpmotion
[root@linux]#
|
/usr/local/apache2のディレクトリでPHPmotionを展開する。
そしてパーミッションの設定も行なう。
ユーザー名とグループ名は共に「nobody」にする。
|
さて、PHPmotionを動かす際にURLを
http://(アドレス)/
にするために、Apache2の設定ファイル(httpd.conf)を触る必要がある。
そこでHTMLなどのWebコンテンツ(今回はPHPmotionに当たる)を
置くディレクトリについての設定だ。
まずはHTMLなどの文書関連のルートディレクトリの設定について
HTMLなどのファイルを置くための
ルートディレクトリの指定 (httpd.conf) |
|---|
#
# DocumentRoot: The directory out of which you will serve your
# documents. By default, all requests are taken from this directory, but
# symbolic links and aliases may be used to point to other locations.
#
DocumentRoot "/usr/local/apache2/phpmotion"
|
ルートディレクトリの指定だ。
この指定にこだわらなくても良いのだ。
|
そして中身を置くディレクトリの設定を行なう。
| HTMLの中身の入ったディレクトリの設定(httpd.conf) |
|---|
<Directory "/usr/local/apache2/phpmotion">
#
# Possible values for the Options directive are "None", "All",
# or any combination of:
# Indexes Includes FollowSymLinks SymLinksifOwnerMatch ExecCGI MultiViews
#
# Note that "MultiViews" must be named *explicitly* --- "Options All"
# doesn't give it to you.
#
# The Options directive is both complicated and important. Please see
# http://httpd.apache.org/docs/2.2/mod/core.html#options
# for more information.
#
Options Indexes FollowSymLinks ExecCGI
#
# AllowOverride controls what directives may be placed in .htaccess files.
# It can be "All", "None", or any combination of the keywords:
# Options FileInfo AuthConfig Limit
#
AllowOverride All
#
# Controls who can get stuff from this server.
#
Order allow,deny
Allow from all
</Directory>
|
赤い部分は、CGIを有効にする
青い部分は、rewriteを有効にするのだ。
|
URLの指定で「index.html」の場合、ファイル名の指定は不要になる。
「index.php」でもファイル名の指定を不要にする設定を行なう。
| index.phpでもファイル名の指定を不要にする(httpd.conf) |
|---|
#
# DirectoryIndex: sets the file that Apache will serve if a directory
# is requested.
#
<IfModule dir_module>
DirectoryIndex index.php index.html
</IfModule>
|
|
赤い部分が追加した箇所だ。
|
次にCGIのファイルだが、置き場所の設定を行なう。
| CGIのファイルの置き場所の指定 (httpd.conf) |
|---|
<IfModule alias_module>
#
# Redirect: Allows you to tell clients about documents that used to
# exist in your server's namespace, but do not anymore. The client
# will make a new request for the document at its new location.
# Example:
# Redirect permanent /foo http://www.example.com/bar
#
# Alias: Maps web paths into filesystem paths and is used to
# access content that does not live under the DocumentRoot.
# Example:
# Alias /webpath /full/filesystem/path
#
# If you include a trailing / on /webpath then the server will
# require it to be present in the URL. You will also likely
# need to provide a <Directory> section to allow access to
# the filesystem path.
#
# ScriptAlias: This controls which directories contain server scripts.
# ScriptAliases are essentially the same as Aliases, except that
# documents in the target directory are treated as applications and
# run by the server when requested rather than as documents sent to the
# client. The same rules about trailing "/" apply to ScriptAlias
# directives as to Alias.
#
ScriptAlias /cgi-bin/ "/usr/local/apache2/phpmotion/cgi-bin/"
</IfModule>
|
そしてPHPとCGIファイルの拡張子の認識のため、以下の設定を行なう。
| PHPとCGIファイルの拡張子の認識(httpd.conf) |
|---|
<IfModule mime_module>
途中、省略
#
# AddHandler allows you to map certain file extensions to "handlers":
# actions unrelated to filetype. These can be either built into the server
# or added with the Action directive (see below)
#
# To use CGI scripts outside of ScriptAliased directories:
# (You will also need to add "ExecCGI" to the "Options" directive.)
#
AddHandler cgi-script .cgi .pl .pm
途中、省略
#
# To use php files
#
AddType application/x-httpd-php .php
AddType application/x-httpd-php-source .phps
</IfModule>
|
赤い部分はCGIの拡張子認識の設定だ。
初期設定では「cgi」のみだが、Perlなどを動かすため
「pm」と「pl」を追加する。
そして青い部分はPHPファイルを認識させるための設定だ。
|
これでapache2の設定は完了だ。
PHPmotionを展開した時、「phpSHIELD」という
PHPのモジュールが付属でついている。
だが、そのphpSHIELD「ixed.5.3.lin」を
PHPに認識させる必要があるのだ。
PHPmotionを展開した際
phpSHIELDがあるディレクトリ |
|---|
[root@linux]# pwd
/usr/local/apache2/phpmotion/phpshield/Linux_x86-32
[root@linux]# ls
ixed.4.3.lin ixed.5.0.0.lin ixed.5.0.2.lin ixed.5.1.lin ixed.5.3.lin
ixed.4.3ts.lin ixed.5.0.0ts.lin ixed.5.0.2ts.lin ixed.5.1ts.lin ixed.5.3ts.lin
ixed.4.4.lin ixed.5.0.1.lin ixed.5.0.lin ixed.5.2.lin
ixed.4.4ts.lin ixed.5.0.1ts.lin ixed.5.0ts.lin ixed.5.2ts.lin
[root@linux]#
|
上の赤いファイルをPHPの付属ライブラリとして
所定のディレクトリーに入れる必要があるというのだ。
| 所定のディレクトリに入れる |
|---|
[root@linux]# cp ixed.5.3.lin /usr/local/lib/php/extensions/
[root@linux]#
|
PHPなのだが、バージョンが5.3.6なのだ。
そしてソースコンパイルしているのだ。
もし、RPMでPHPをインストールした場合は
必ずしも、このディレクトリとはいえないので注意が必要だ。
|
だが、所定のディレクトリにコピーしても認識させる必要がある。
そこでPHPの設定ファイル「php.ini」の記述の変更を行なう。
| php.iniの記述変更 |
|---|
extension=/usr/local/lib/php/extensions/ixed.5.3.lin
|
外部ライブラリの指定は、絶対パスが必要みたいだ。
ただし、phpはソースコンパイルなので
インストールの際のライブラリを置くディレクトリの設定や
RPMでのインストールによって、ディレクトリの場所は
異なる事があります。
|
次に日本語表示の設定を行なう必要がある。
MySQLのデータは文字コードをUTF-8にしている。
そして、Webで表示もUTF-8にする場合、以下の設定を行なうのだ。
そしてPHPの設定ファイルで文字コードの処理を行なう必要がある。
出力ハンドラーの設定なのだ。
| PHP.iniの設定(出力ハンドラー) |
|---|
| 変更前 |
; Note: You cannot use both "mb_output_handler" with "ob_iconv_handler"
; and you cannot use both "ob_gzhandler" and "zlib.output_compression".
; Note: output_handler must be empty if this is set 'On' !!!!
; Instead you must use zlib.output_handler.
; http://php.net/output-handler
;output_handler =
|
| 変更後 |
; Note: You cannot use both "mb_output_handler" with "ob_iconv_handler"
; and you cannot use both "ob_gzhandler" and "zlib.output_compression".
; Note: output_handler must be empty if this is set 'On' !!!!
; Instead you must use zlib.output_handler.
; http://php.net/output-handler
output_handler = mb_output_handler
|
MySQLのデータ内部がUTF-8なので、データ処理に関する
文字コードをUTF-8に合わせる。
| PHP.iniの設定(文字コードの設定) |
|---|
| 変更前 |
[mbstring]
; language for internal character representation.
; http://php.net/mbstring.language
;mbstring.language = Japanese
; internal/script encoding.
; Some encoding cannot work as internal encoding.
; (e.g. SJIS, BIG5, ISO-2022-*)
; http://php.net/mbstring.internal-encoding
;mbstring.internal_encoding = EUC-JP
; http input encoding.
; http://php.net/mbstring.http-input
;mbstring.http_input = auto
; http output encoding. mb_output_handler must be
; registered as output buffer to function
; http://php.net/mbstring.http-output
;mbstring.http_output = SJIS
; enable automatic encoding translation according to
; mbstring.internal_encoding setting. Input chars are
; converted to internal encoding by setting this to On.
; Note: Do _not_ use automatic encoding translation for
; portable libs/applications.
; http://php.net/mbstring.encoding-translation
;mbstring.encoding_translation = Off
; automatic encoding detection order.
; auto means
; http://php.net/mbstring.detect-order
;mbstring.detect_order = auto
; substitute_character used when character cannot be converted
; one from another
; http://php.net/mbstring.substitute-character
;mbstring.substitute_character = none;
; overload(replace) single byte functions by mbstring functions.
; mail(), ereg(), etc are overloaded by mb_send_mail(), mb_ereg(),
; etc. Possible values are 0,1,2,4 or combination of them.
; For example, 7 for overload everything.
; 0: No overload
; 1: Overload mail() function
; 2: Overload str*() functions
; 4: Overload ereg*() functions
; http://php.net/mbstring.func-overload
;mbstring.func_overload = 0
; enable strict encoding detection.
;mbstring.strict_detection = Off
; This directive specifies the regex pattern of content types for which mb_output_handler()
; is activated.
; Default: mbstring.http_output_conv_mimetype=^(text/|application/xhtml\+xml)
;mbstring.http_output_conv_mimetype=
; Allows to set script encoding. Only affects if PHP is compiled with --enable-zend-multibyte
; Default: ""
;mbstring.script_encoding=
|
| 変更後 |
[mbstring]
; language for internal character representation.
; http://php.net/mbstring.language
mbstring.language = Japanese
; internal/script encoding.
; Some encoding cannot work as internal encoding.
; (e.g. SJIS, BIG5, ISO-2022-*)
; http://php.net/mbstring.internal-encoding
mbstring.internal_encoding = UTF-8
; http input encoding.
; http://php.net/mbstring.http-input
mbstring.http_input = auto
; http output encoding. mb_output_handler must be
; registered as output buffer to function
; http://php.net/mbstring.http-output
mbstring.http_output = UTF-8
; enable automatic encoding translation according to
; mbstring.internal_encoding setting. Input chars are
; converted to internal encoding by setting this to On.
; Note: Do _not_ use automatic encoding translation for
; portable libs/applications.
; http://php.net/mbstring.encoding-translation
mbstring.encoding_translation = On
; automatic encoding detection order.
; auto means
; http://php.net/mbstring.detect-order
mbstring.detect_order = auto
; substitute_character used when character cannot be converted
; one from another
; http://php.net/mbstring.substitute-character
;mbstring.substitute_character = none;
; overload(replace) single byte functions by mbstring functions.
; mail(), ereg(), etc are overloaded by mb_send_mail(), mb_ereg(),
; etc. Possible values are 0,1,2,4 or combination of them.
; For example, 7 for overload everything.
; 0: No overload
; 1: Overload mail() function
; 2: Overload str*() functions
; 4: Overload ereg*() functions
; http://php.net/mbstring.func-overload
;mbstring.func_overload = 0
; enable strict encoding detection.
;mbstring.strict_detection = Off
; This directive specifies the regex pattern of content types for which mb_output_handler()
; is activated.
; Default: mbstring.http_output_conv_mimetype=^(text/|application/xhtml\+xml)
;mbstring.http_output_conv_mimetype=
; Allows to set script encoding. Only affects if PHP is compiled with --enable-zend-multibyte
; Default: ""
;mbstring.script_encoding=
|
赤い部分は先頭の「;」を省いて有効にした箇所。
青い部分は設定の記述を変更した箇所。
|
そして動画のアップロードの際の、アップロード可能な
データ容量の設定を行なう。
| POSTでデータ送信できる容量の変更 |
|---|
| 変更前 |
; Maximum size of POST data that PHP will accept.
; http://php.net/post-max-size
post_max_size = 8M
|
| 変更後 |
; Maximum size of POST data that PHP will accept.
; http://php.net/post-max-size
post_max_size = 208M
|
8Mバイトから、208Mバイトに変更したのだ。
そしてアップロードできる量も変更する。
| アップロードできるデータ容量の変更 |
|---|
| 変更前 |
; Maximum allowed size for uploaded files.
; http://php.net/upload-max-filesize
upload_max_filesize = 2M
|
| 変更後 |
; Maximum allowed size for uploaded files.
; http://php.net/upload-max-filesize
upload_max_filesize = 208M
|
これでPHPの設定が終わった。
いよいよphpmotionのインストールと設定だ。
Webで誘導形式でインストール作業が行なわれるのだ。
以下のようにインストール画面に接続する。
http://(IPアドレス)/
すると以下の画面が出てくる。
| phpmotionのインストール開始 |
|---|
 |
|
「Continue」ボタンを押せば、次に進む。
|
そしてPHPmotionのインストールする前の点検画面だ。
| 各種ソフトなどの点検画面 |
|---|
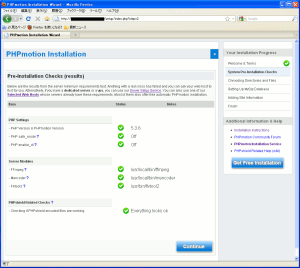 |
| 拡大図 |
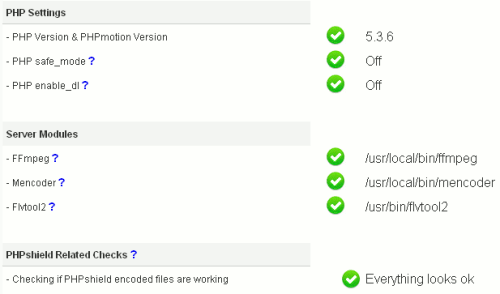 |
全て良しだ (^^)
これで多くの動画に対応できるだろう。
|
さて、先に進めるのだが、このままでは以下のようなエラーが出る。
| こんなエラーが出る |
|---|
 |
PHPmotionを展開した時の各ディレクトリーに対して
処理を施すのだが、パーミッションの設定が
許可になっていないため、エラーが出てしまうのだ
|
そこでパーミッションの変更を行なう。
| 各ディレクトリのパーミッションの変更 |
|---|
chmod 777 addons/
chmod 777 addons/customprofile/
chmod 777 addons/customprofile/
chmod 777 addons/customprofile/member_css/
chmod 777 addons/customprofile/member_images/
chmod 777 addons/albums/
chmod 777 addons/albums/images/
chmod 777 addons/albums/thumbs/
chmod 777 classes/
chmod 777 logs/
chmod 777 pictures/
chmod 777 temp/
chmod 777 uploads
chmod 777 uploads/avi
chmod 777 uploads/thumbs
chmod 777 uploads/audio
chmod 777 uploads/player_thumbs
chmod 777 setup
chmod 755 cgi-bin
chmod 755 cgi-bin/audio/uu_default_config.pm
chmod 755 cgi-bin/audio/uu_ini_status.pl
chmod 755 cgi-bin/audio/uu_lib.pm
chmod 755 cgi-bin/audio/uu_upload.pl
|
各ディレクトリーや実行ファイルの権限を変更した所で
再度、インストール作業を進める。
| パーミッションに問題がない場合 |
|---|
 |
そして前に進める。
次にMySQLへの接続関連の設定だ。
| MySQLへの接続関連の設定 |
|---|
 |
| 拡大図 |
 |
接続するMySQLのマシン名(もしくはIPアドレス)。
今回は、同じマシン上なので「localhost」にした。
そして接続先のデータベース名の指定。
データベースの所有者のIDとパスワードなのだ。
|
次へ進める。
PHPmotionの管理者の設定を行なう画面になる。
| 管理者の設定画面 |
|---|
 |
| 拡大図 |
 |
管理者名(ID)、パスワード、管理者の連絡先メールアドレス。
PHPmotionを公開した時のURLの指定を行なう。
|
次に進むと、インストール完了の画面になる。
| PHPmotionのインストール完了の画面 |
|---|
 |
そして、ここから先に進む前、PHPmotionの
インストールの際に使ったディレクトリを消去する必要がある。
そうでないと以下の警告が出るからだ。
| こんな警告画面が出る |
|---|
 |
| 警告内容の拡大 |
|
Important!! - You must now delete the whole /setup folder
|
要するにインストールに使ったファイルなどは
完全に消去しなさいという意味なのだ。
|
そこでsetupディレクトリを削除するのだ。
削除した上で次に進むと、管理画面が出てくるのだ。
| 管理画面にログインする画面 |
|---|
 |
だが、このままでは英語表示になってしまうので
日本語パッチを当てる必要がある。
ここから日本語パッチをダウンロードする。
PHPmotion/日本語化ファイル
zip形式のファイルなのだ。
展開すると「japanese.php」が表れる。
英語版のファイル上に、そのまま上書きしてしまえば良いのだ。
英語版の実行のファイルに
日本語版の実行のファイルを上書きする。 |
|---|
[root@linux]# cd lang
[root@linux]# ls
english.php japanese.php
[root@linux]#
[root@linux]# cp japanese.php english.php
cp: `english.php' を上書きしてもよろしいですか(yes/no)? yes
[root@linux]#
|
langディレクトリに各言語の表示を司るファイルが保管されている。
japanese.phpには、日本語の表示やコメントのデータが入っている。
色々、触るのが面倒なので、英語版を上書きしたのだ。
|
これでインストールは完了だ。
あと、動画のアップロードの際、PHPの設定ファイル(php.ini)以外にも
PHPmotionの設定ファイルで触る必要が出てくるかもしれない箇所がある。
PHPmotionを置いている所の、cgi-/binのディレクトリにある
uu_default_config.pmなのだ。
| uu_default_config.pmのファイル |
|---|
$config = {
config_file_name => 'uu_default_config',
temp_dir => $ENV{'DOCUMENT_ROOT'} . '/temp/',
upload_dir => $ENV{'DOCUMENT_ROOT'} . '/uploads/avi/',
redirect_url => '/uploader_finished.php',
path_to_upload => '/uploads/avi/',
unique_upload_dir => 0,
unique_upload_dir_length => 20,
unique_file_name => 1,
unique_file_name_length => 20,
create_files_by_rename => 1,
max_upload => 209715200,
overwrite_existing_files => 0,
redirect_after_upload => 1,
|
初期設定で既に最大アップロード量が200M以上になっているので
そのままにした。でも、もっと大きな動画をアップロードするには
この部分の設定を変更する必要があるのだ。
|
これで準備良しなのだ (^^)
PHPmotionのアップロードについて
少し管理画面について触れたいと思います。
動画のアップロードの際、管理画面でカテゴリー設定を行なう必要がある。
そこで管理画面を開く。URLは以下の通りだ。
http://PHPmotionのURL/siteadmin
| 管理者用のログイン画面 |
|---|
 |
| ログイン画面の拡大 |
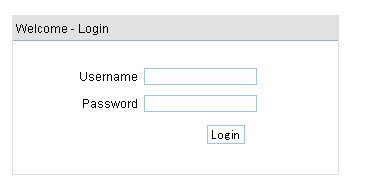 |
日本語パッチを当てても、ここだけは英語のままなのだ。
まぁ、英語でも支障はないので良いなのだ。
|
そしてログインをする。
| 管理者画面のログインした |
|---|
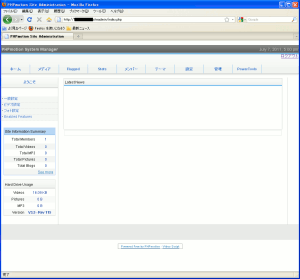 |
そして動画を載せる際に必要な設定を行なう。
動画の分類のためカテゴリーを設ける必要がある。
そこでカテゴリーの設定を行なうのだ。
| カテゴリー設定 |
|---|
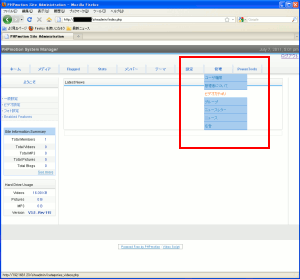 |
| 拡大図 |
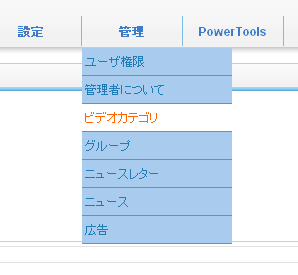 |
|
ビデオカテゴリーを選択する。
|
カテゴリー名などを決めるのだ。
| カテゴリー設定 |
|---|
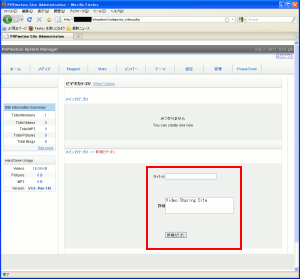 |
| 拡大図 |
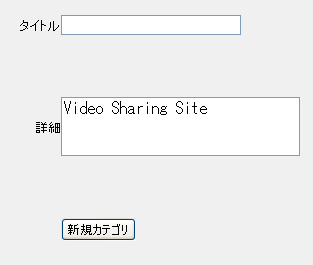 |
|
タイトルと詳細を書いて「新規カテゴリ」を押せば良いのだ。
|
これでカテゴリーが登録されたので、動画の掲載が可能になるのだ。
動画掲載の方法
さて、動画掲載の方法を説明します。
| PHPmotionの画面 |
|---|
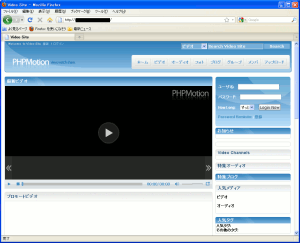 |
アップロードのボタンがあるのだが、ログインしないと
動画を掲載できないため、まずはログインを行なう。
| ログイン |
|---|
 |
ログインした後、アップロードのボタンを押す。
| アップロードを選択する |
|---|
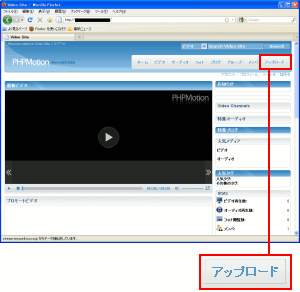 |
そしてビデオアップロードのボタンを選ぶ。
| アップロードするデータの選択画面 |
|---|
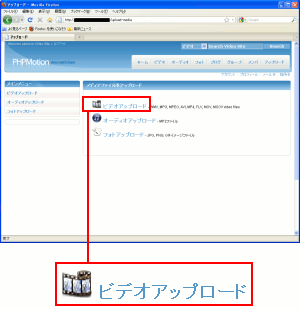 |
動画、オーディオ(音声・音楽)、写真の3種類が掲載できる。
今回は動画データなので「ビデオアップロード」を選択する。
|
次に、掲載する動画についての情報を書き込む画面が出てくる。
| 動画情報の記入画面 |
|---|
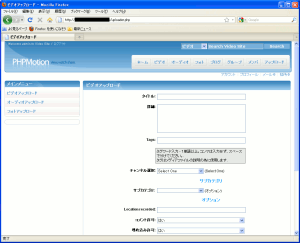 |
| 拡大図 |
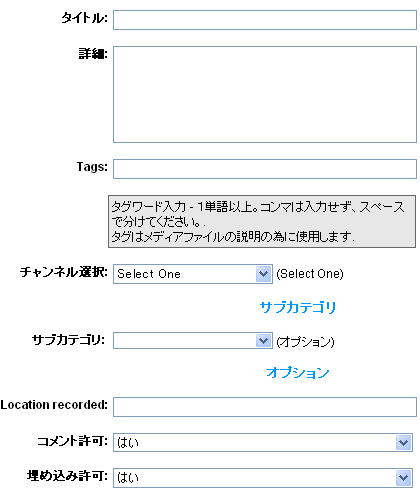 |
タイトルは必須。
詳細は、動画の説明なので、あった方がわかりやすい、
タグなのだが1コマ空けて記入。2個以上の単語が必須だ。
カテゴリー選択も行なうのも必要だ。
|
そしてアップロードする動画を選ぶ。
| アップロードする動画を選択 |
|---|
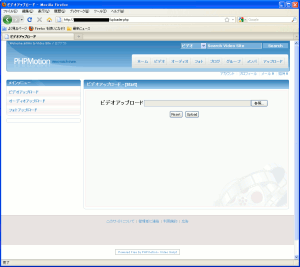 |
そしてアップロードが開始される。
| 動画のアップロード中 |
|---|
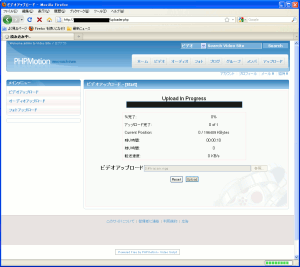 |
そしてアップロードが終わると以下の画面になる。
| アップロード終了画面 |
|---|
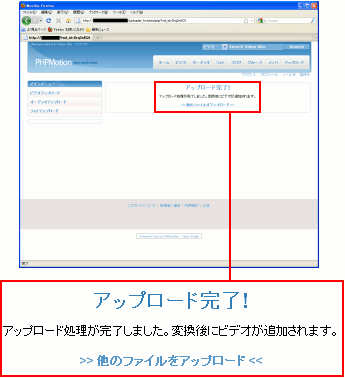 |
アップロードが終了しても、サーバー側で動画をFLV形式に変換するため
動画閲覧できるまでは時間がかかる。
この点ではyoutubeも同じなのだ (^^)
| アップロード成功 |
|---|
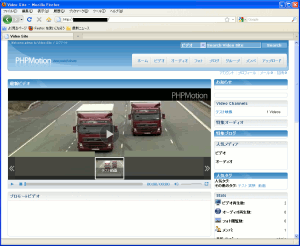 |
アップロードした動画が再生できる状態になったのだ。
まるでyoutubeそっくりなのだ。
|
これで社内向けの動画や販売促進用の動画などを、
どんどん載せていけば良いのだ (^^)
PHPmotion導入後について
早速、社内動画サイトの運用開始を全社通達で流した。
いくつか反応があった。
社内教育のビデオの掲載が良いかも!
いつでも見れるから便利
もちろん、全てが良い反応ではない。
動画の動きが、ぎこちない!
本社と営業所を結ぶ回線速度の問題や、動画を動かすパソコンの問題で
今すぐに解決できる問題ではない。
こんな声も出てきた。
客先で閲覧できるようにして欲しい!
社内LAN内にサーバーを置いているため、VPNなどを使って
ファイヤウォール越えする必要がある。
その上、回線速度の問題もある。何せ、インターネット接続の回線が
フレッツADSLの8Mを使っている。下りは速いが、上りは遅い。
VPNで接続できても、上り回線を使って社内のサーバーから
データを読み込むため、動きが遅くなるのは予想できる。
なので、外部でも閲覧できるようにするには、youtubeになってくる。
不特定多数の人に見られても問題ない動画や
著作権の問題がない動画については、youtubeに掲載しようという話になった。
著作権については「システム奮闘記:その94」(著作権入門)をご覧下さい。
社内に動画配信サイトを置く事で以下の利点があります。
| 社内向け動画サイトの設置の利点 |
|---|
| (1) |
Webでいつでも閲覧可能 |
| (2) |
動画ソフトや動画形式の対応の問題が起こらない |
| (3) |
本社で動画管理が行なえる |
| (4) |
動画CD配布だとCD紛失の問題があるが
その問題がなくなる。複製、配送の手間も省ける。
|
| (5) |
社内のみ閲覧なので、社内向け教育動画が掲載できる |
これで動画配信の基盤ができた。
どういう風に展開していくのか。これからが楽しみだ。
コーデックについて
当初、この章でコーデックの話を取り上げる予定でしたが
どんどん話が膨らんでしまったため、ここでは割愛する事にしました。
そのため「システム奮闘記:その96」に載せる事にしました。
コーデック:動画データ、音声データ、コンテナ
次章:「コーデック入門 動画ファイル、オーディオデータ、コンテナ」を読む
前章:「著作権入門」を読む
目次:システム奮闘記に戻る


